
In this post, I’ll share a quick start guide on Google Cloud Platform’s (GCP) Cloud Fusion. We’ll first take a look at what this product offers, and we will also take a use case of building a data pipeline involving sources from Amazon S3 and Azure Blob storage.
Quick Overview
Using Cloud Data Fusion, you can quickly build and manage your data pipelines. Cloud Data Fusion is a web UI based service for building ETL pipelines including options to transfer, clean, and transform data without having to manage the underlying infrastructure. It is powered by the open source project CDAP.
For more information, please visit the links for cloud fusion or CDAP.
Use Case
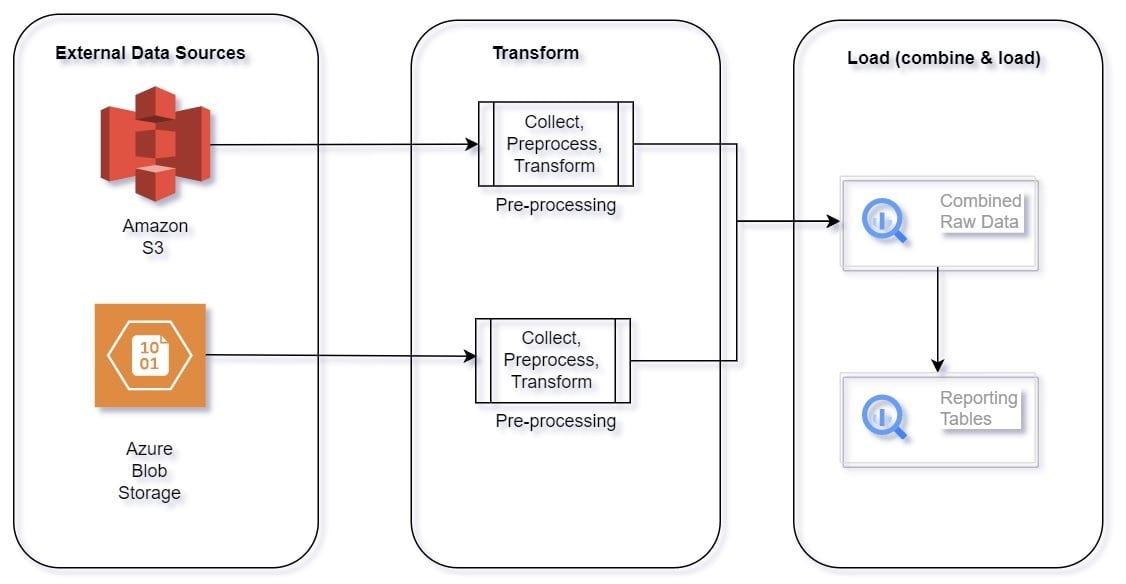
Often, in real-world scenarios, we need to collect data from multiple sources, clean, transform and run analytics to generate reports and make future predictions. Gathering data from multiple sources and performing pre-processing for each source is a difficult task. Data Fusion provides the flexibility to connect to multiple data sources and build a single pipeline to perform the task.
ETL Flow Diagram
Build and Configure Pipeline
Here we’ll see how to assemble data from Amazon S3 and Azure Blob storage into one reporting table.
Technical Details:
- Connect to multiple data sources – AWS S3 and Azure Blob Storage.
- Archive data in GCS bucket for long-term storage.
- Perform pre-processing.
- Load raw data (for each source) into BigQuery.
- Combine data and load into BigQuery.
- Build Reporting tables from combined data.
Prerequisite:
- GCP Account.
- AWS Account.
- Azure Account.
First, let’s configure buckets in AWS and Azure, load files in both, and generate credentials for establishing GCP connection.
AWS configuration:
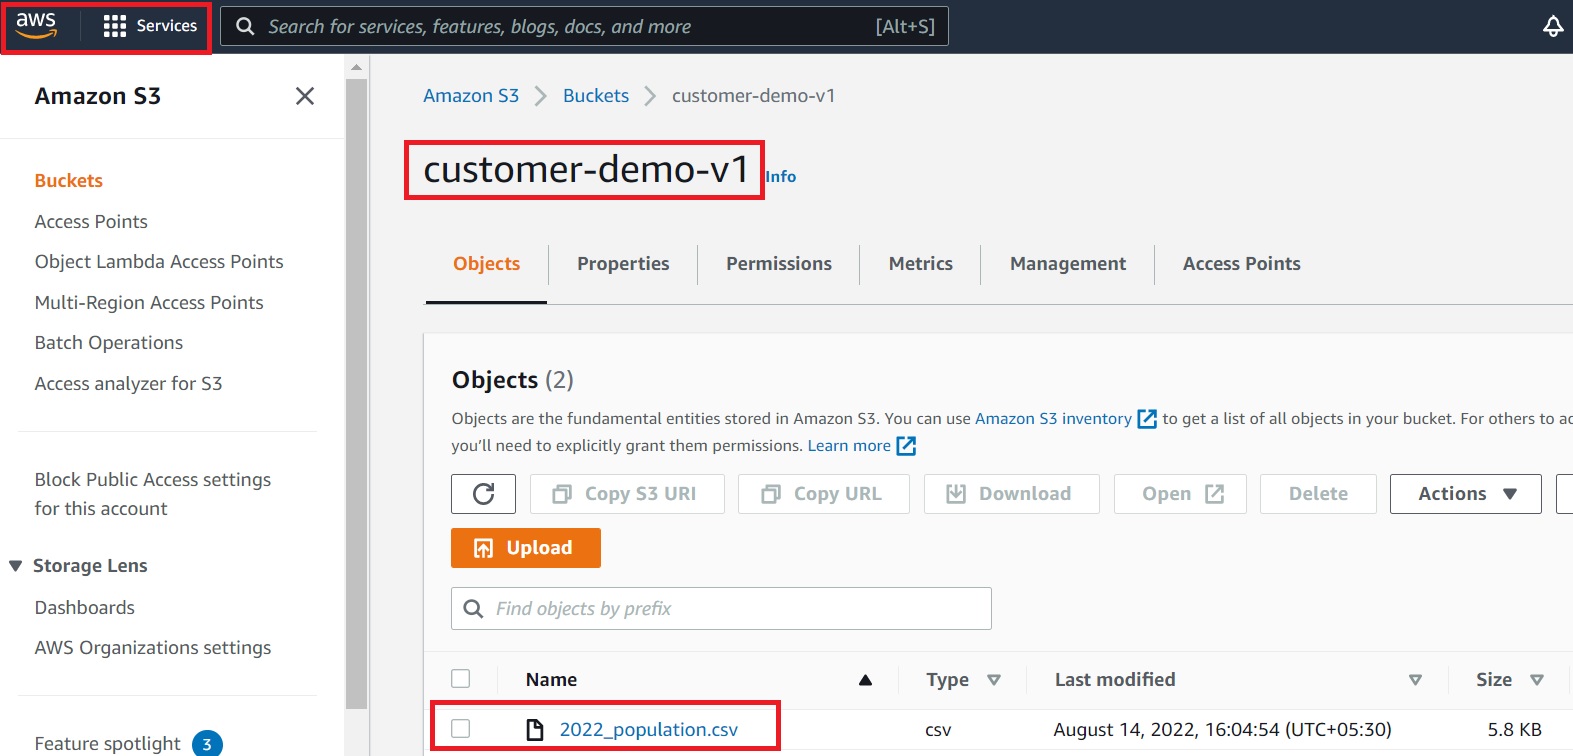
- Login to AWS account and project
- Create a bucket – “customer-demo-v1”
- Upload file 2022_population.csv
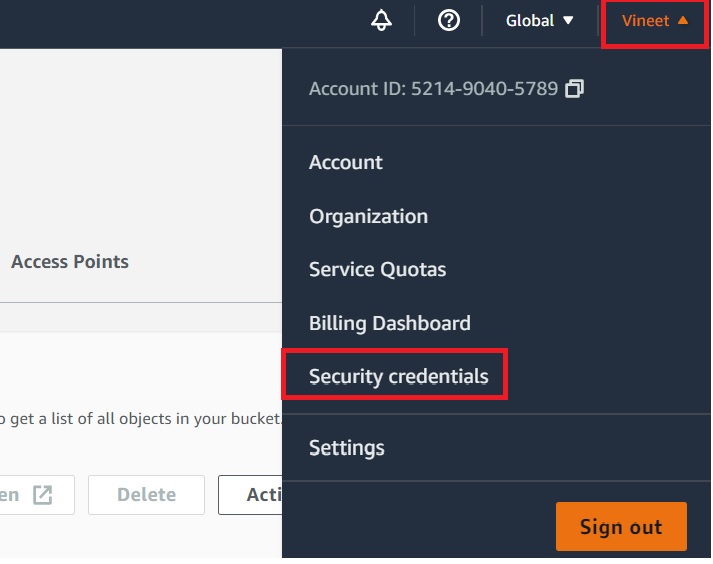
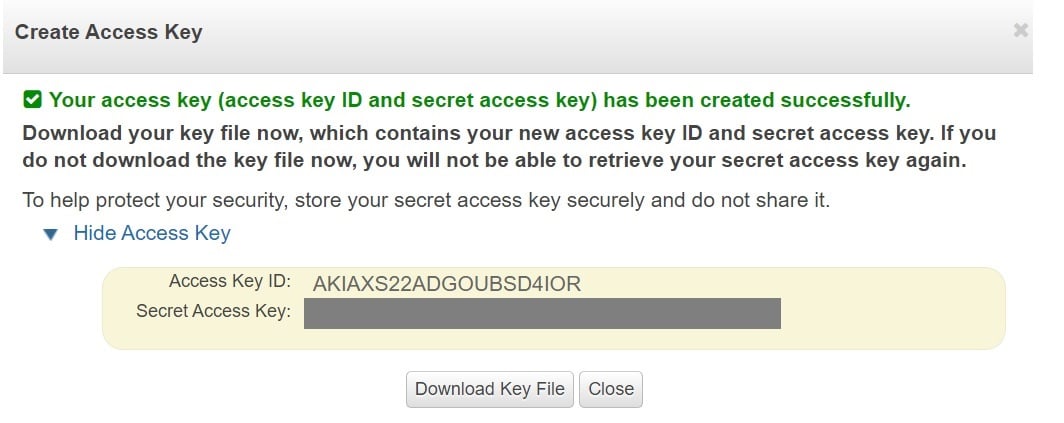
Let’s generate security credentials to grant bucket access to GCP now that the data file has been uploaded.
Steps:
- Go to profile, select Security credentials.
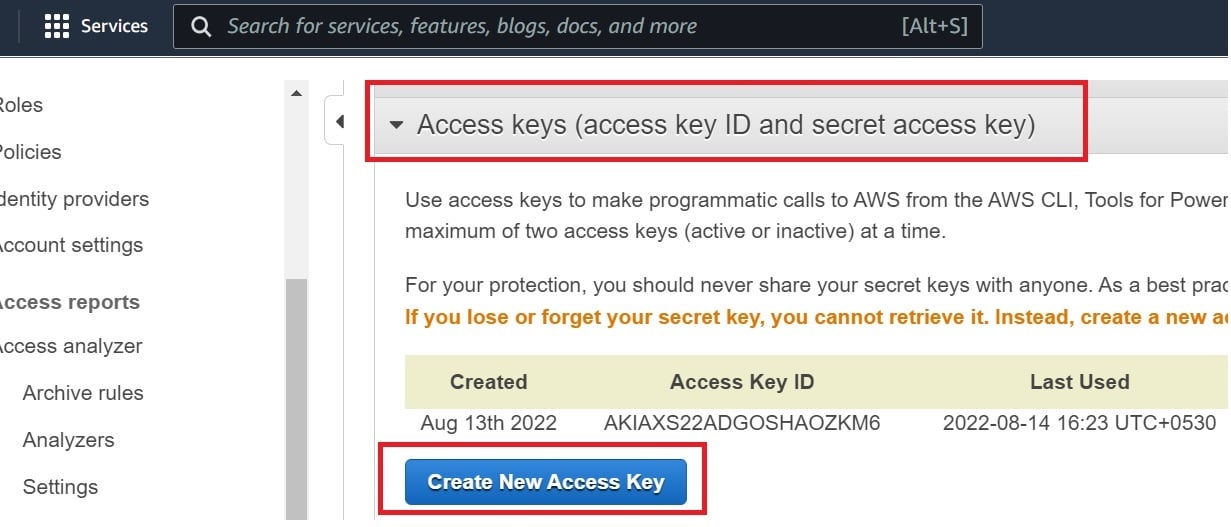
- Navigate to Access keys.
- Create a New Access Key.
- Note down the “Secret Access Key”.
Azure configuration:
- Login to Azure account and project.
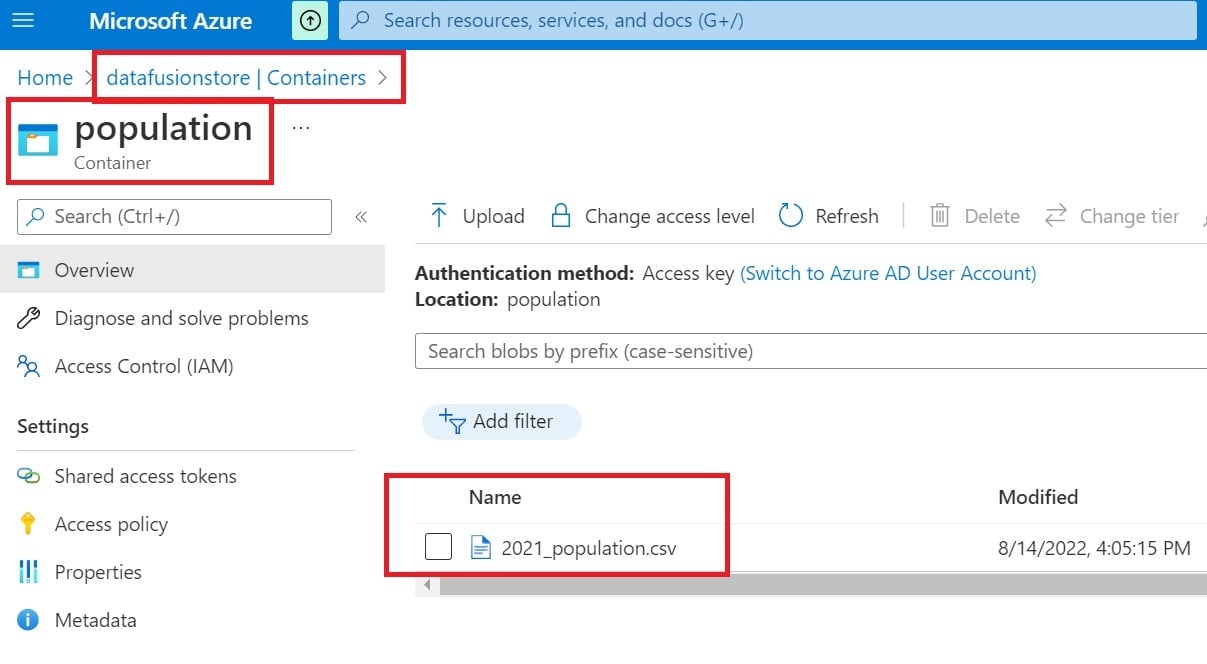
- Create a blob storage – “datafusionstore”.
- Create a container – “population”.
- Upload file 2021_population.csv.
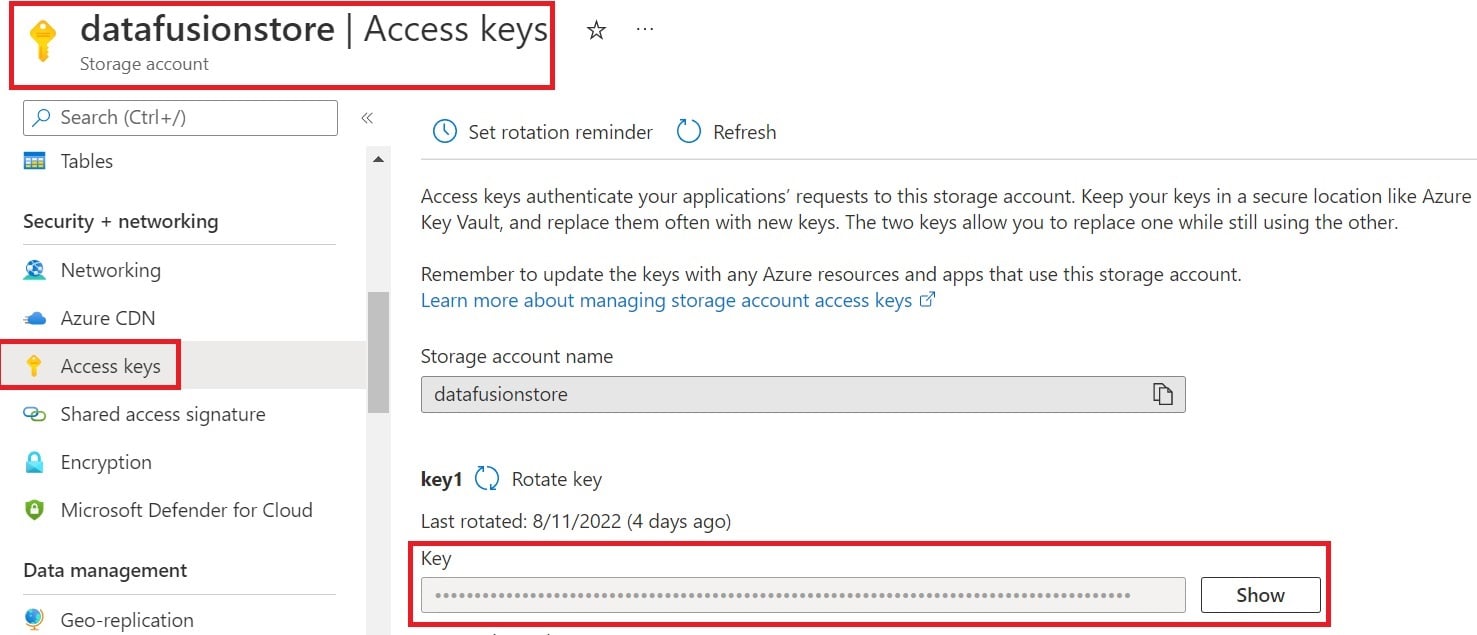
Let’s generate security credentials to grant blob storage access to GCP now that the data file has been uploaded.
Steps:
- Go to datafusionstore blob storage.
- Navigate to Security + Networking section.
- Click on Access Keys
- Note down the key value.
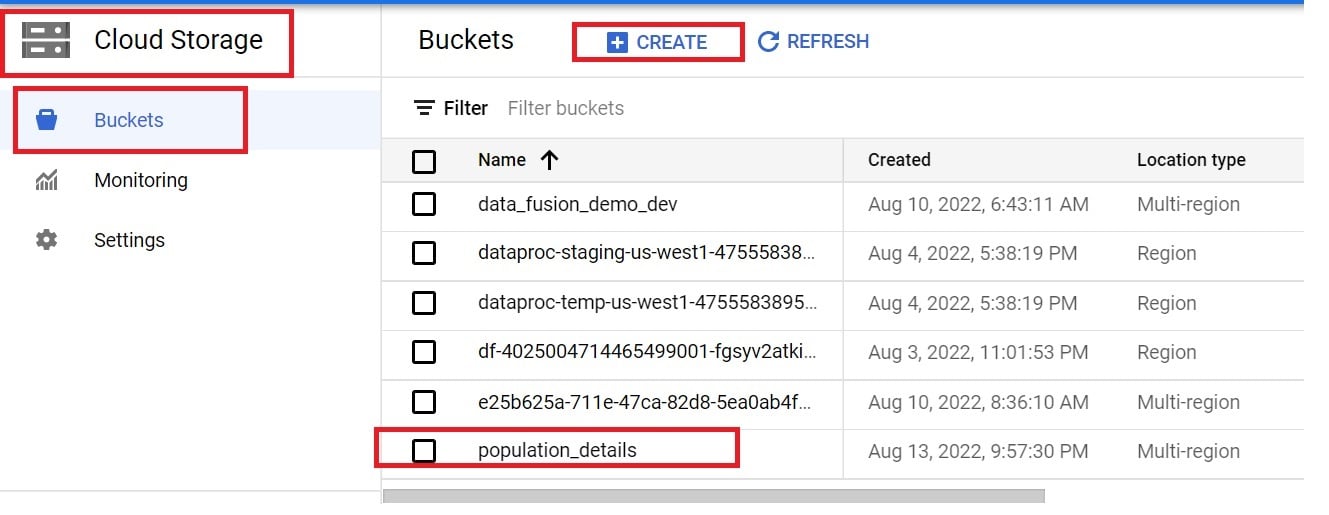
GCP Storage and BigQuery configuration:
- Login to the GCP console and select the project.
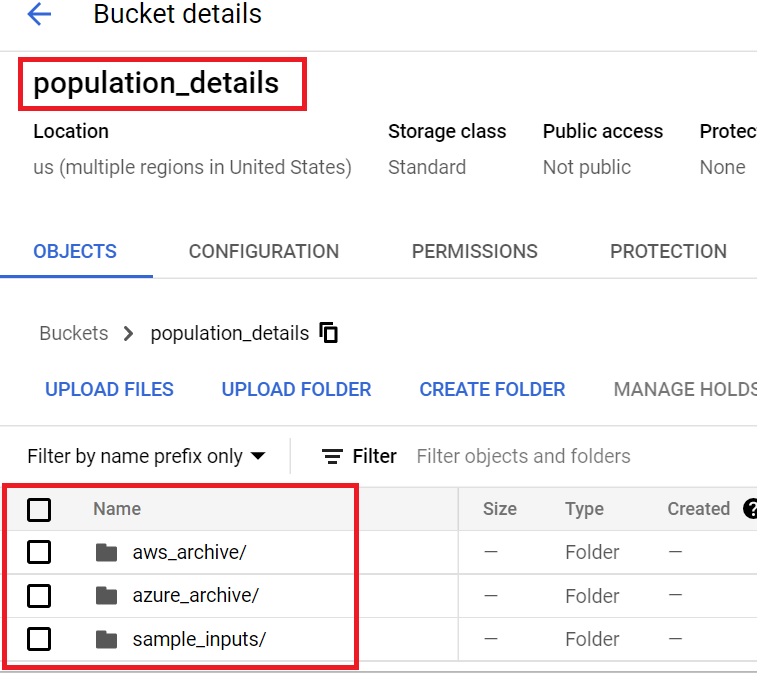
- Create a standard bucket – “population_details”.
- Create archiving folders in the population_details bucket.
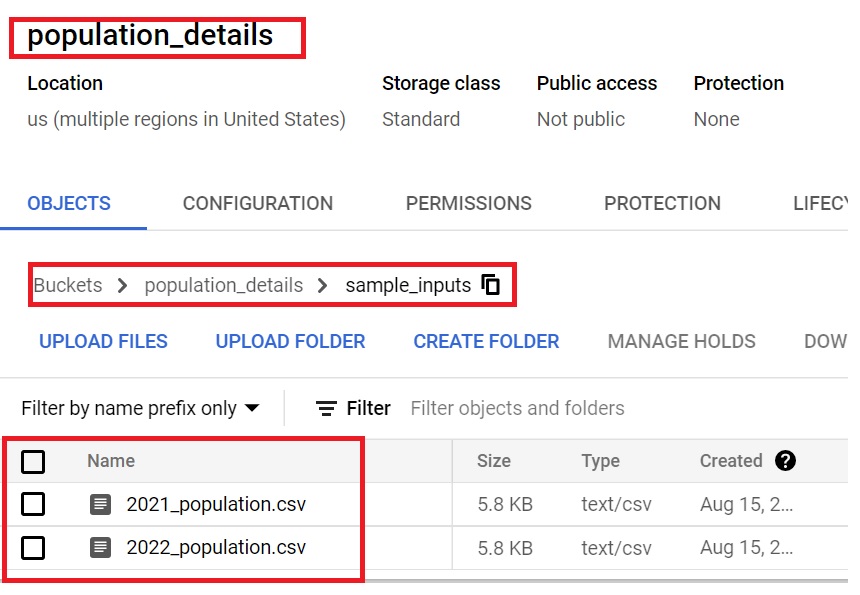
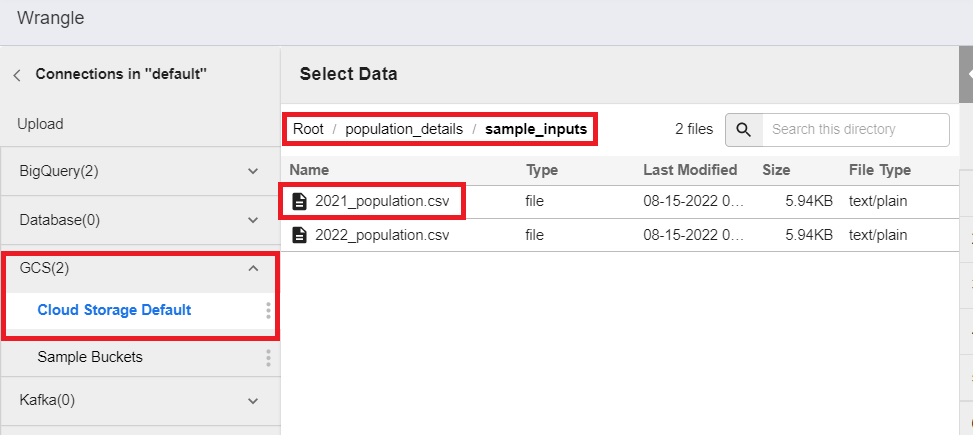
- Create a sample inputs folder and upload the 2021_population.csv and 2022_population.csv file. These will be used for metadata configuration, pre-processing in a data fusion studio.
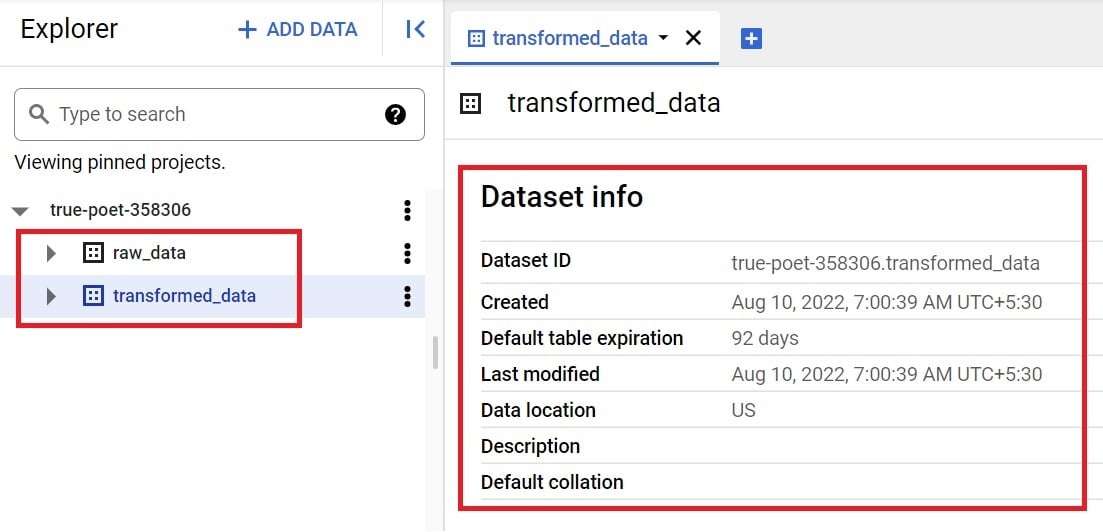
- Go to BigQuery console.
- Create two datasets – raw_data and transformed_data in the US region.
With the basic setup completed, let’s see how we can build an ETL pipeline in data fusion connecting to AWS and Azure.
Steps:
- Login to the GCP console.
- Enable compute engine API and data fusion API.
- Go to the data fusion service and create a basic instance.
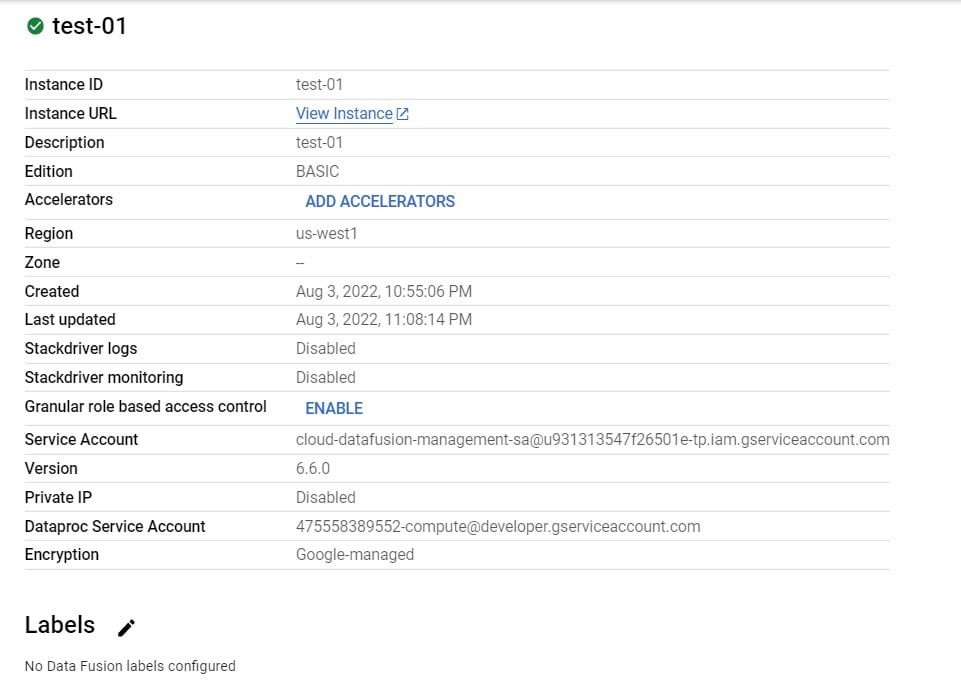
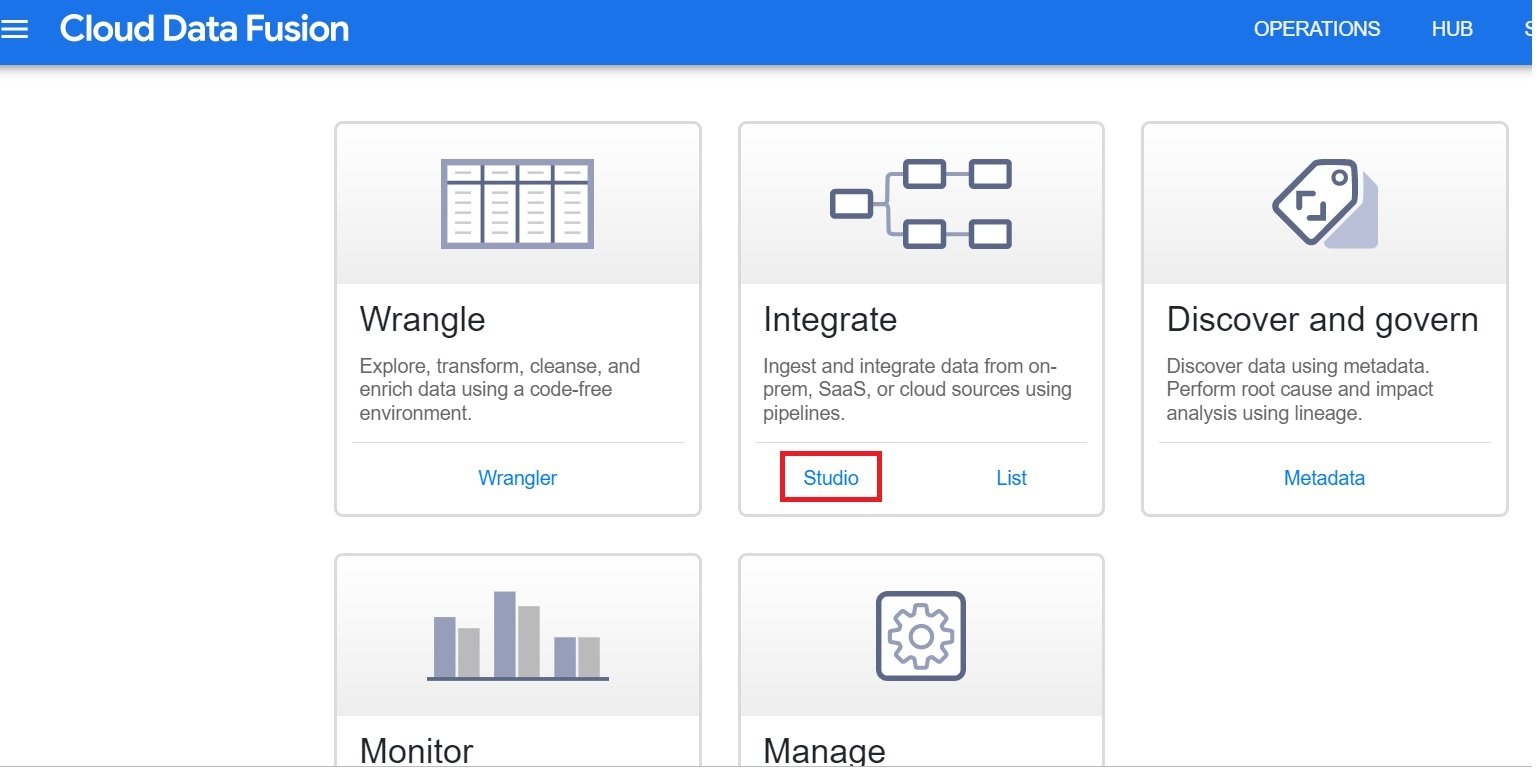
4. Click on the “View Instance” in the data fusion page to open the studio.

5. To start building a pipeline click on “Studio”.
- We need to start the setup by declaring and configuring source details –
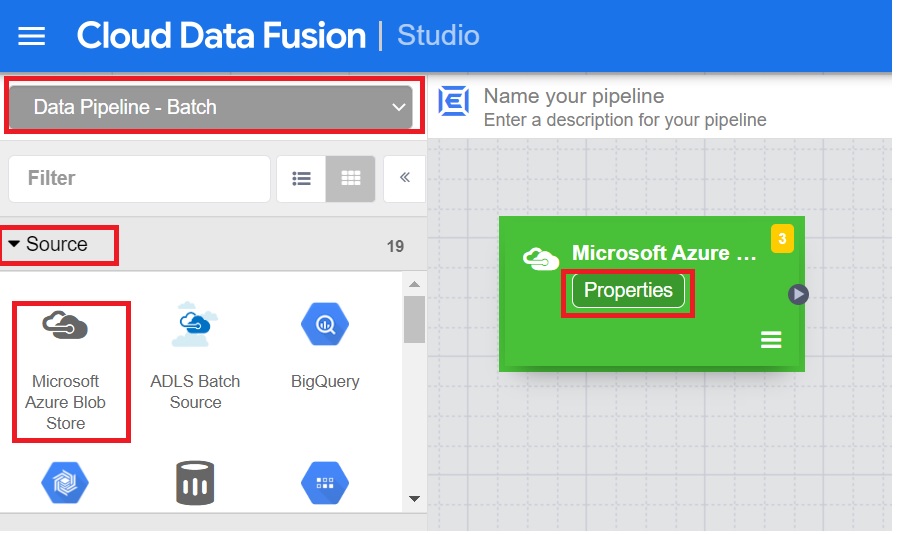
6.1 Choose the Data Pipeline configuration as Batch.
6.2 From Source, click on “Microsoft Azure Blob Store”.
6.3 Click on properties and add the required details –
-
-
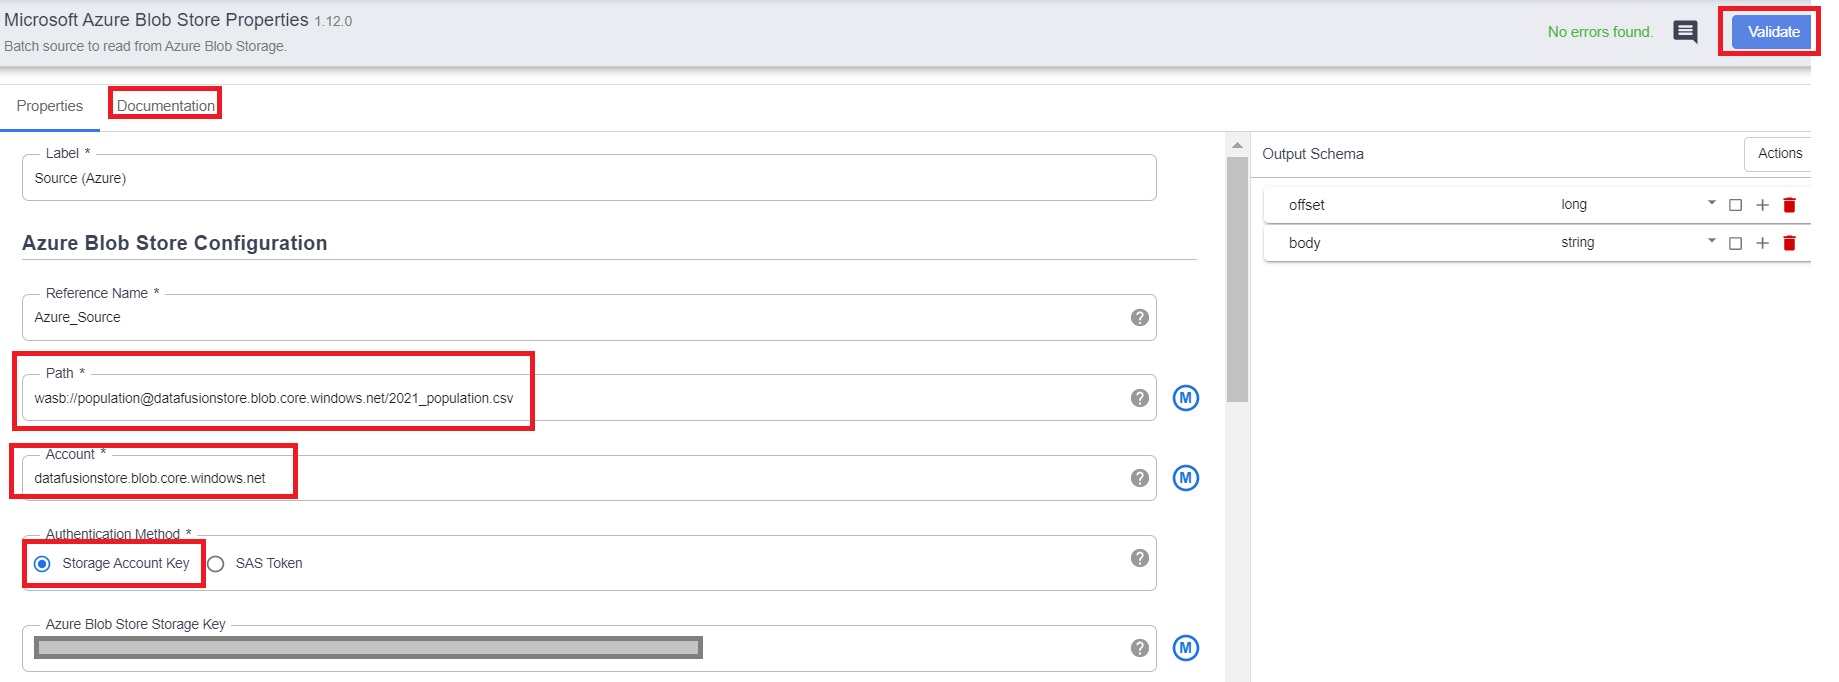
- Path – the complete path of the csv file in Azure blob storage.
- Account – Storage account name.
- Azure Blob Storage Key – the security key generated in the basic setup section for Azure.
- The rest of the fields can be left blank. Click on “Validate” and close.
- Note :- you can click on “Documentation” for more details.
-
We have added the Azure Blob Storage source details successfully.
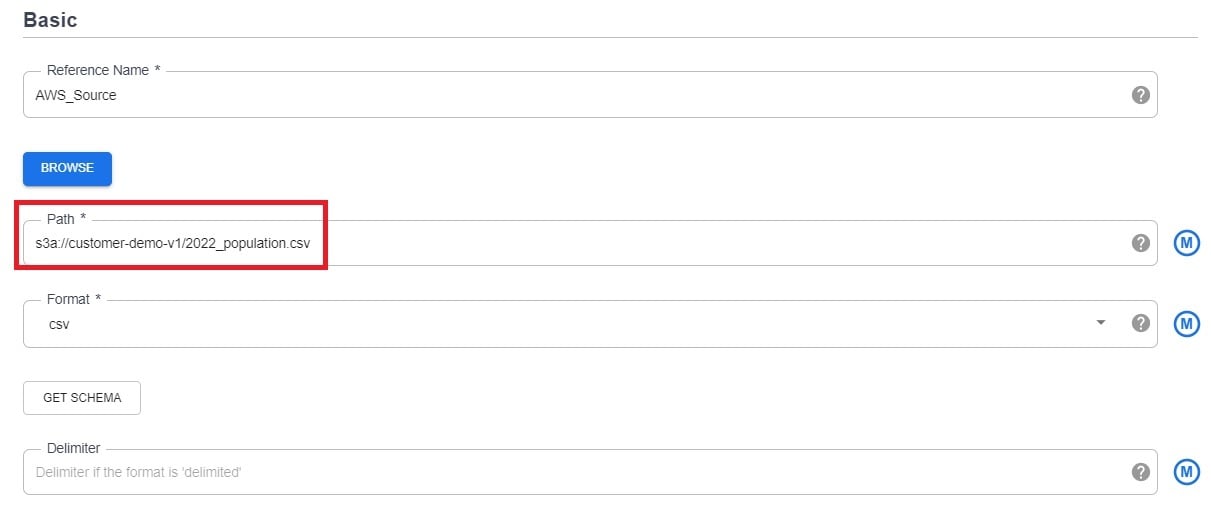
We will now do the same steps for AWS S3 setup –
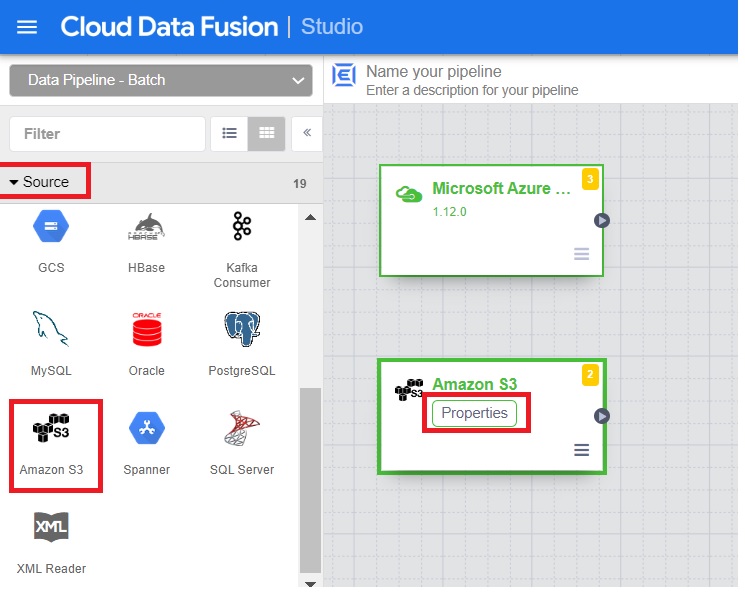
Access ID and Access Key – the security key generated in the basic setup/configuration section for AWS.

Output Schema – Add the details manually for the schema of the 2022_population.csv file.
Path – the complete path of the csv file in Amazon S3 bucket.
Let’s complete the pipeline setup for Azure and then do the same for AWS with some changes.
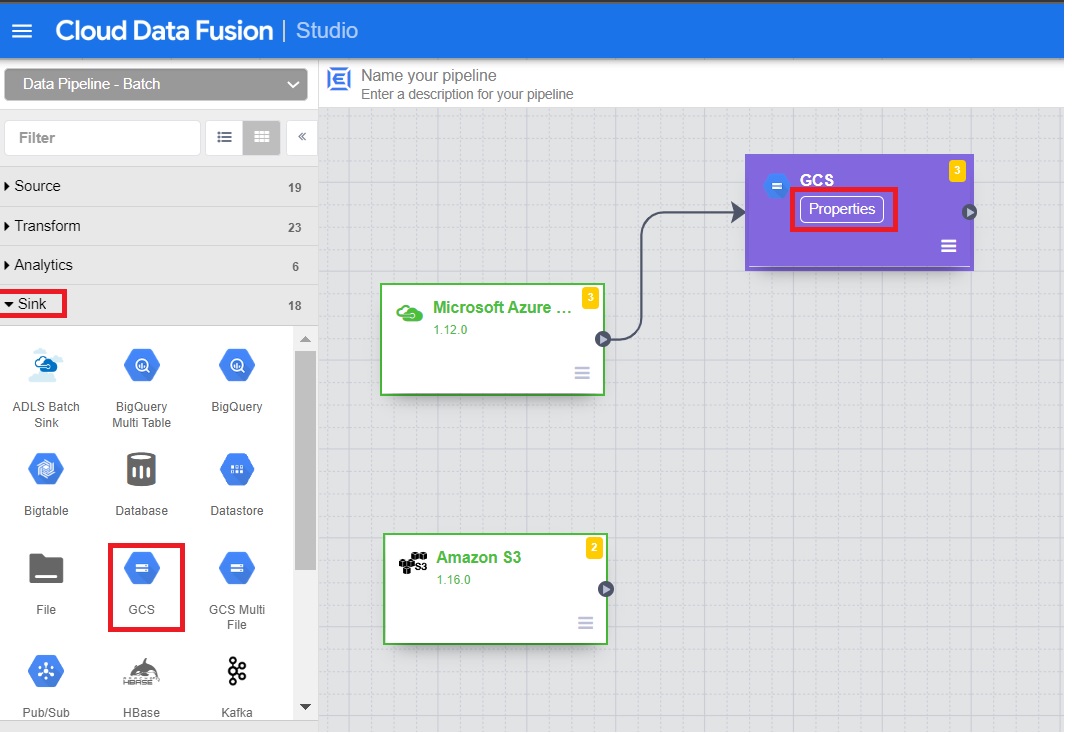
7. Add GCS Sink to archive files from Azure source.
7.1 From Sink, click on GCS.
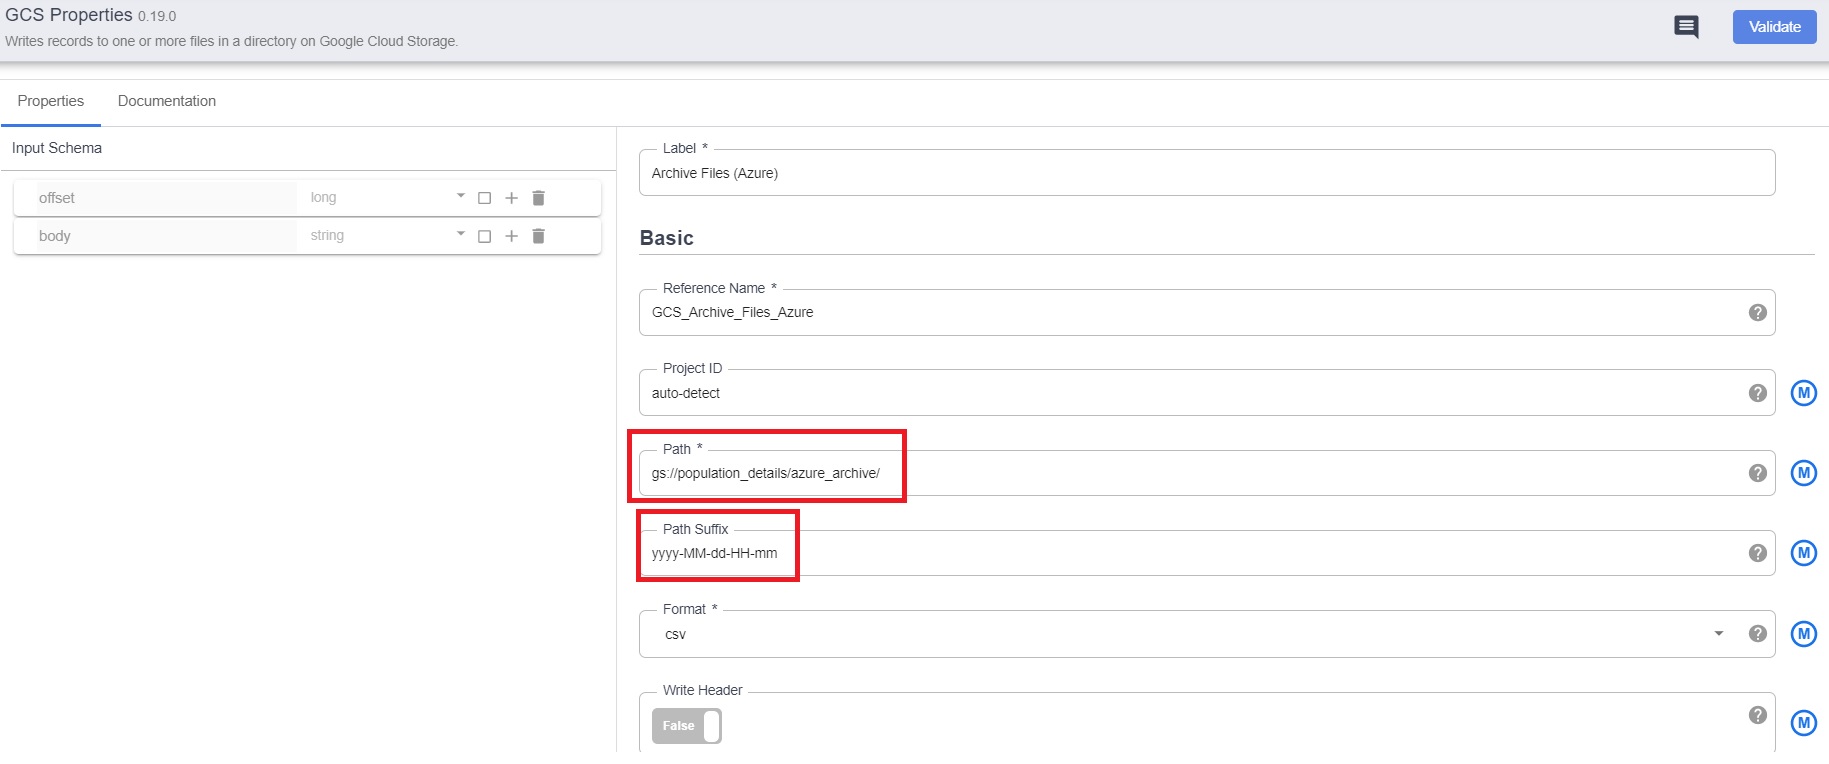
7.2 Configure the properties –
-
- path – the gcs path
- output schema – Add the details manually for the schema of 2021_population.csv file.
- Click on Validate and close if there are no errors.

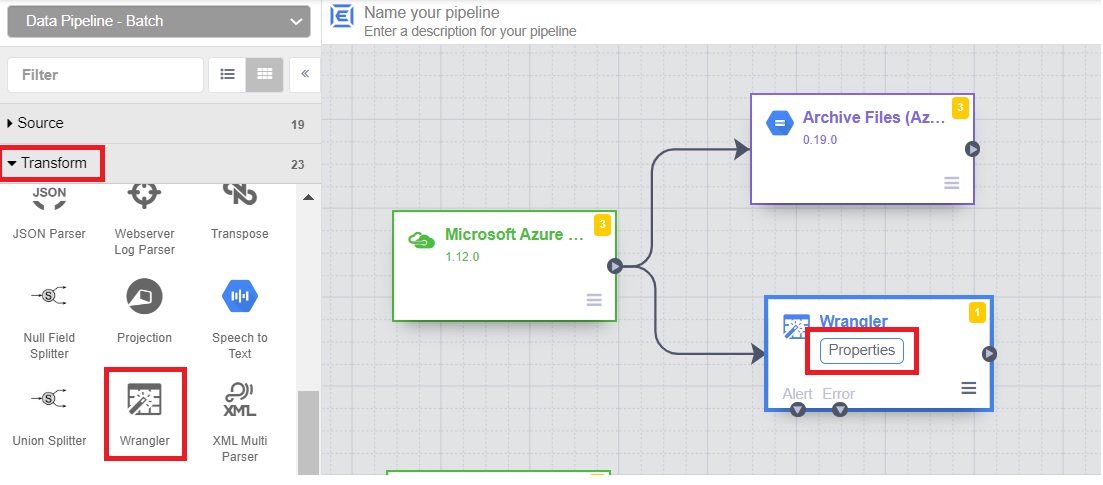
- Add the Transformation/Wrangler
8.1 From the Transform section, click on Wrangler. Click on properties.
8.2 Click on wrangle
8.3 Choose the 2021_population.csv file stored in /population_details/sample_inputs
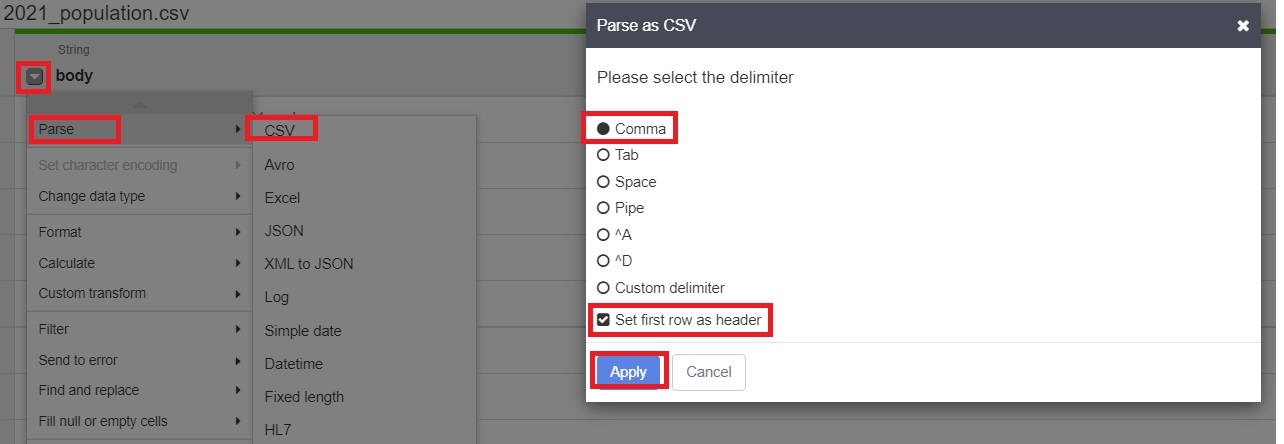
8.4 Parse to csv.
8.5 Remove the “body” column and click on Apply.
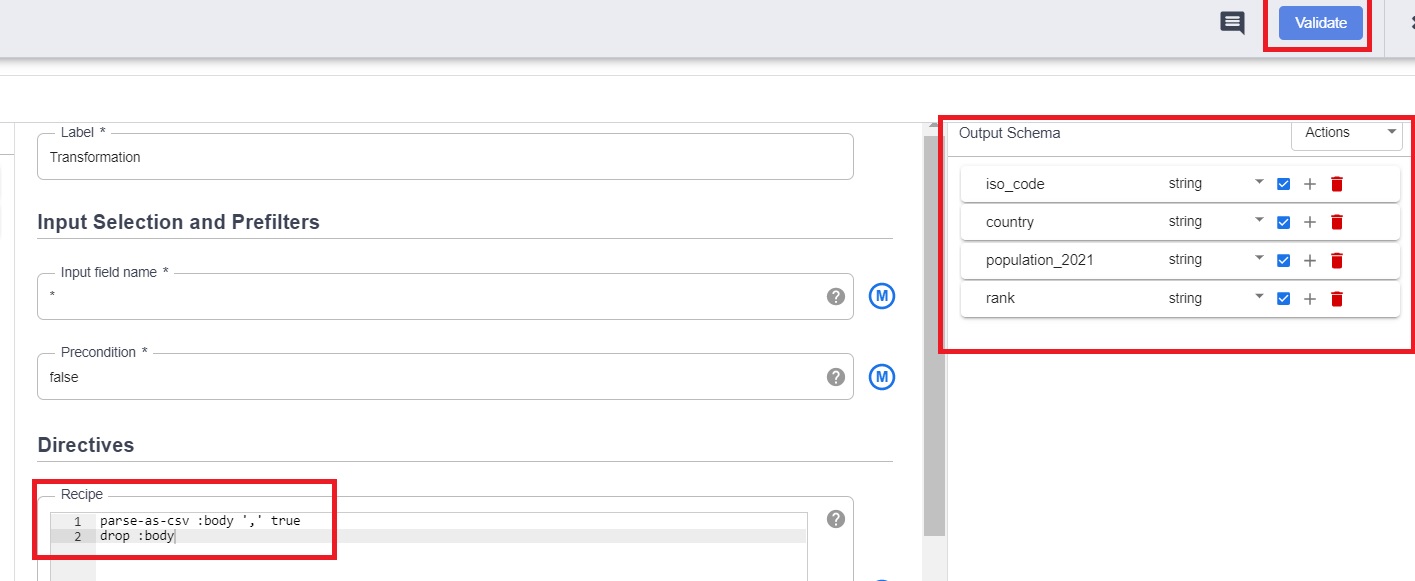
8.6 Verify the transformations we performed and the output schema.
8.7 Click on Validate and close.
Note – More options are available for data cleansing and transformations.


- Load the raw data to BigQuery.
9.1 From the Sink section, click on BigQuery and properties.
9.2 Add details of raw tables.
9.3 Verify the output schema.
9.4 Click on Validate and close.
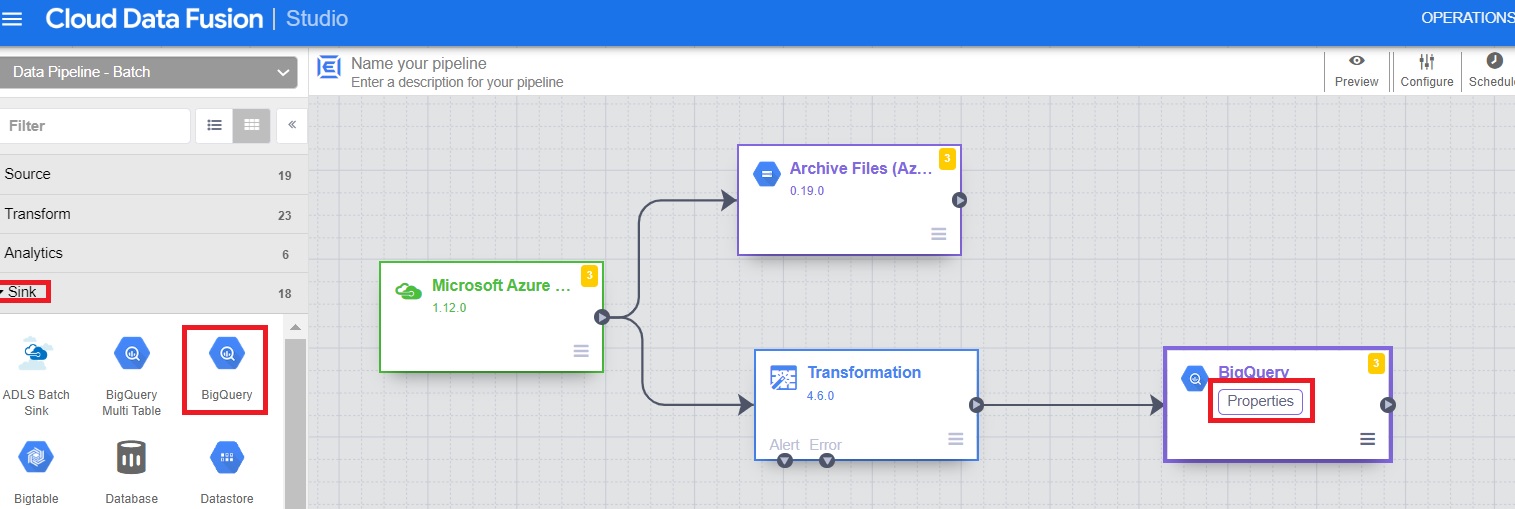

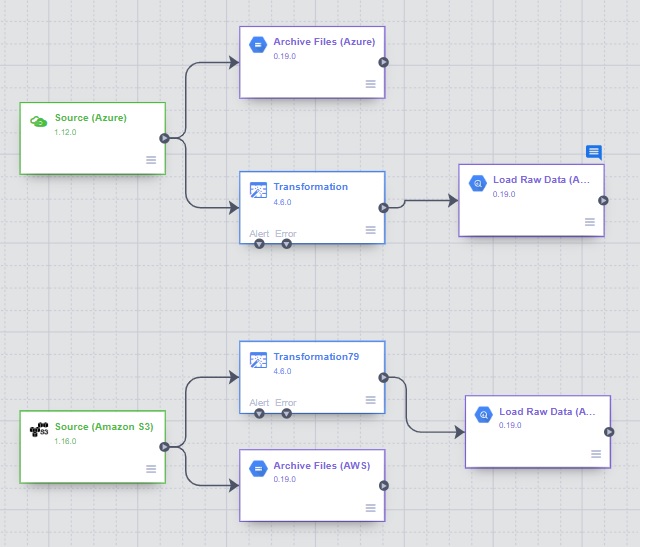
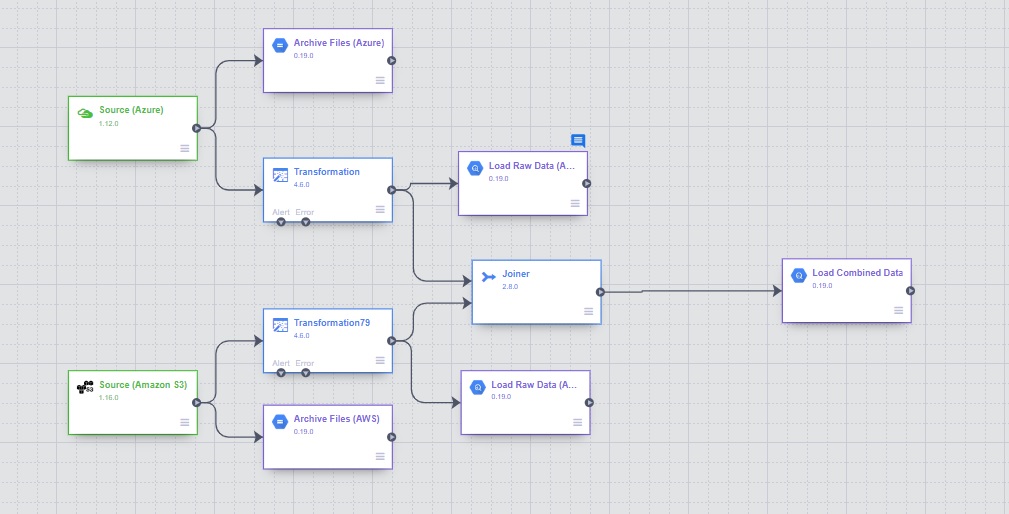
Follow the same steps for AWS (with minor changes in values). The pipeline would then look like this:
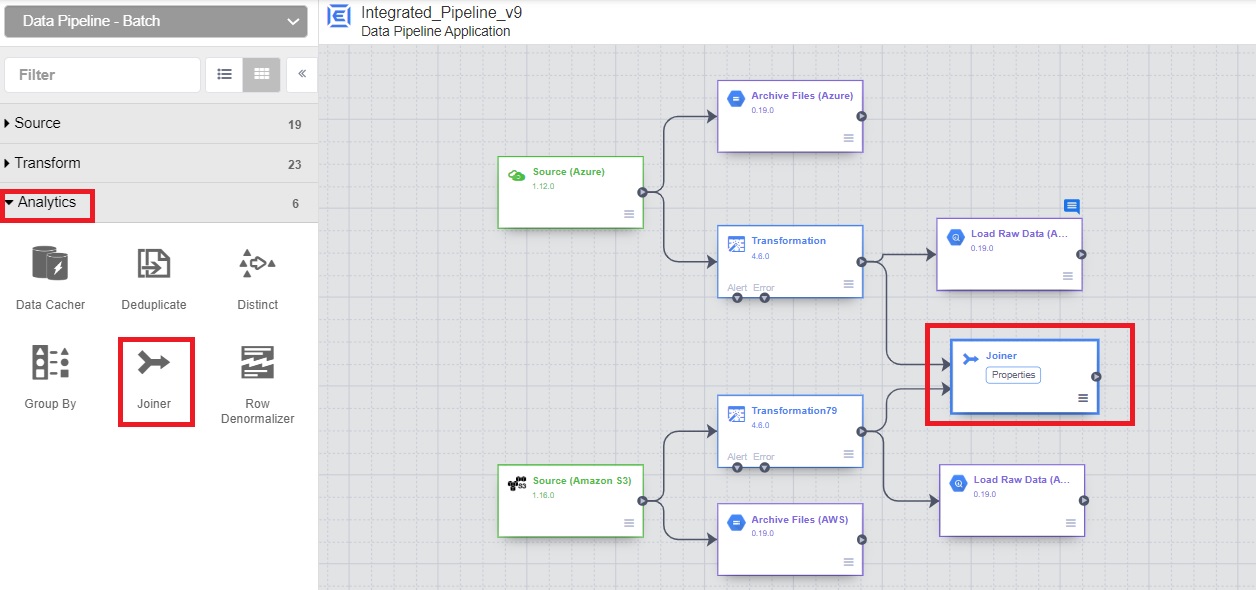
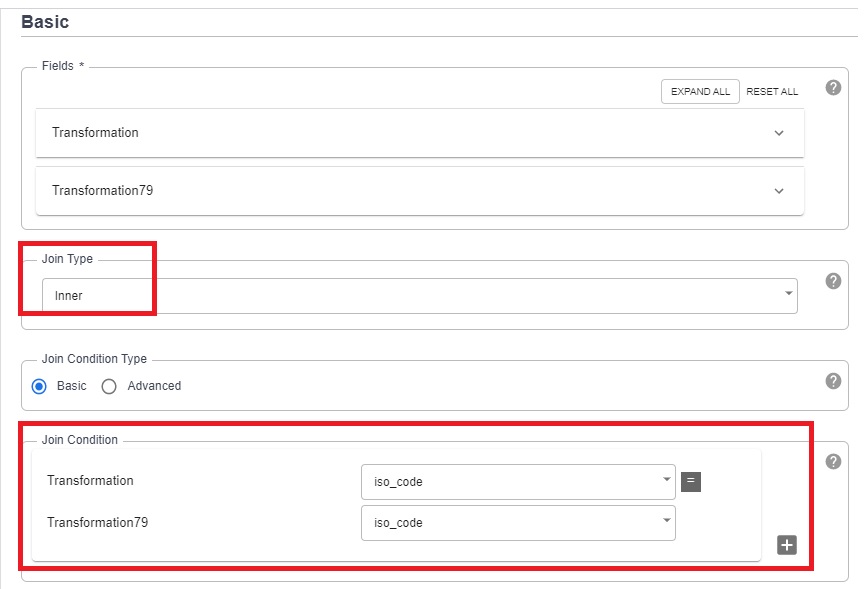
- Add Joiner to combine data.
10.1 From the Analytics section, click on Joiner and properties.
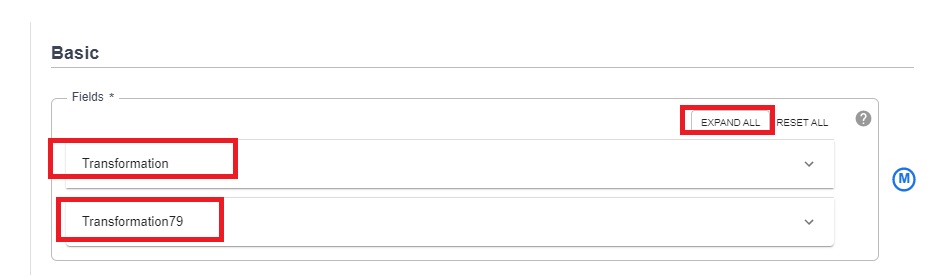
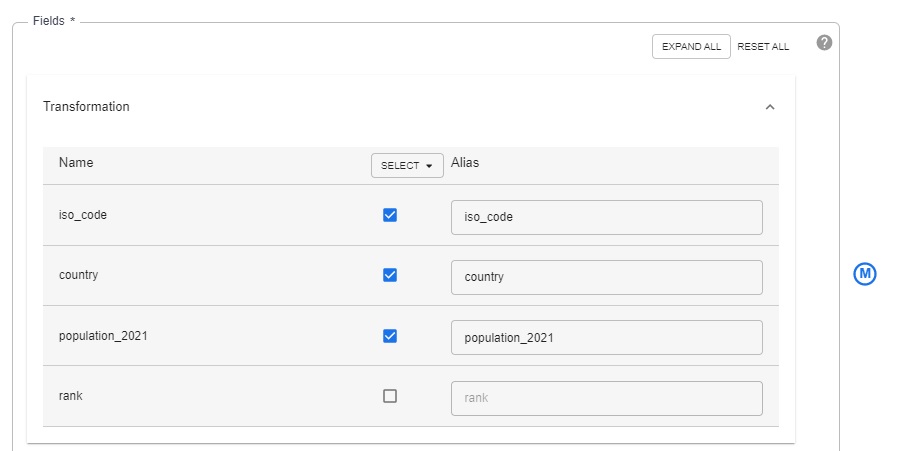
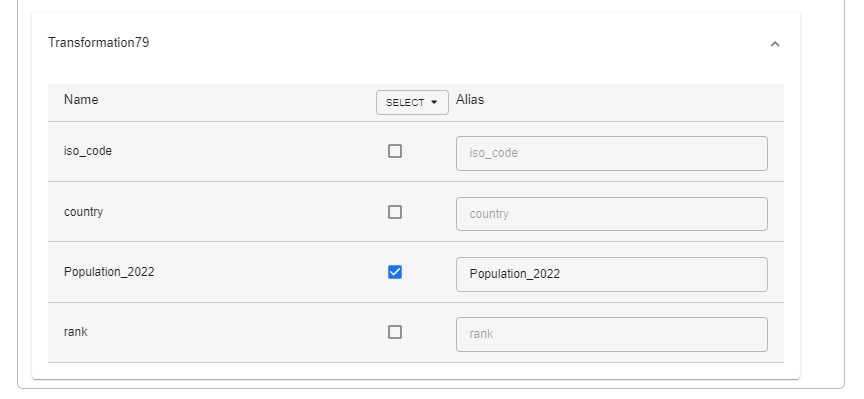
10.2 From both “Transformations”, click Expand and select only the required columns.
10.3 Choose “Inner” join and select the joining column – “iso_code”.
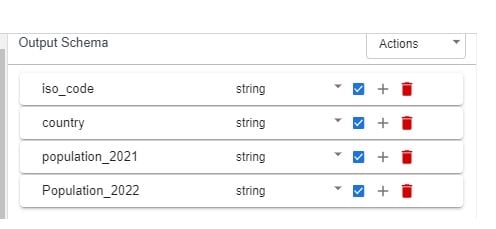
10.4 Verify the output schema.
10.5 Click on validate and close.
Now that we have built the pipeline for collecting, cleaning (pre-processing) and combining data for both the sources, let’s load the data into BigQuery table.
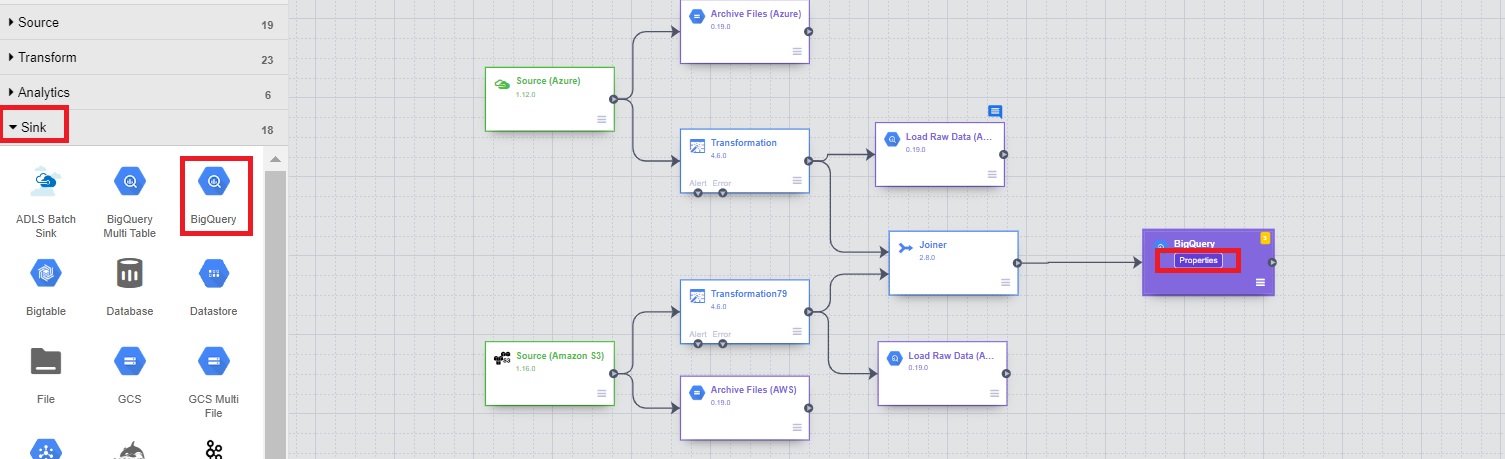
- Load the combined data in BigQuery
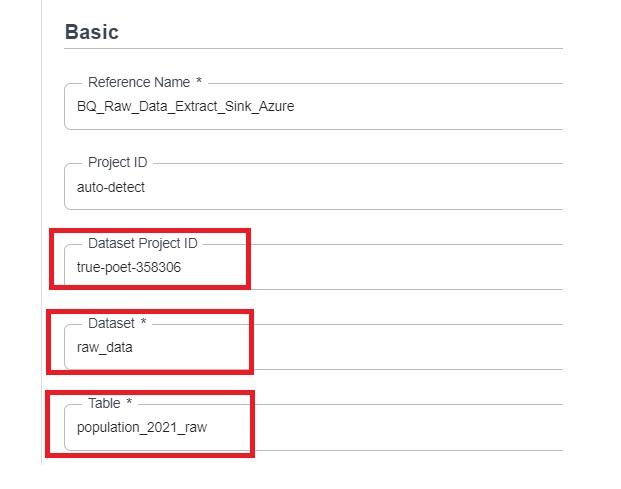
11.1 From the Sink section, click on BigQuery and properties.
11.2 Add details of table.
11.3 Verify the output schema.
11.4 Click on Validate and close.

The pipeline has been completed –
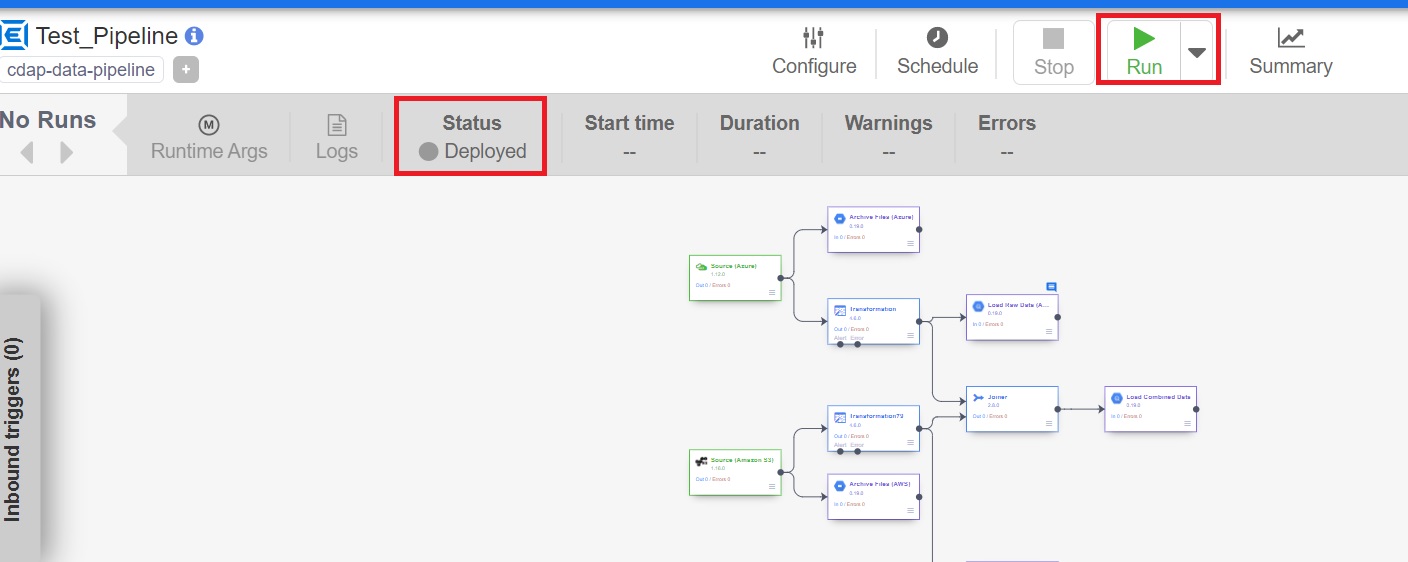
12. Add name, save and deploy the pipeline.

13. Run the pipeline.
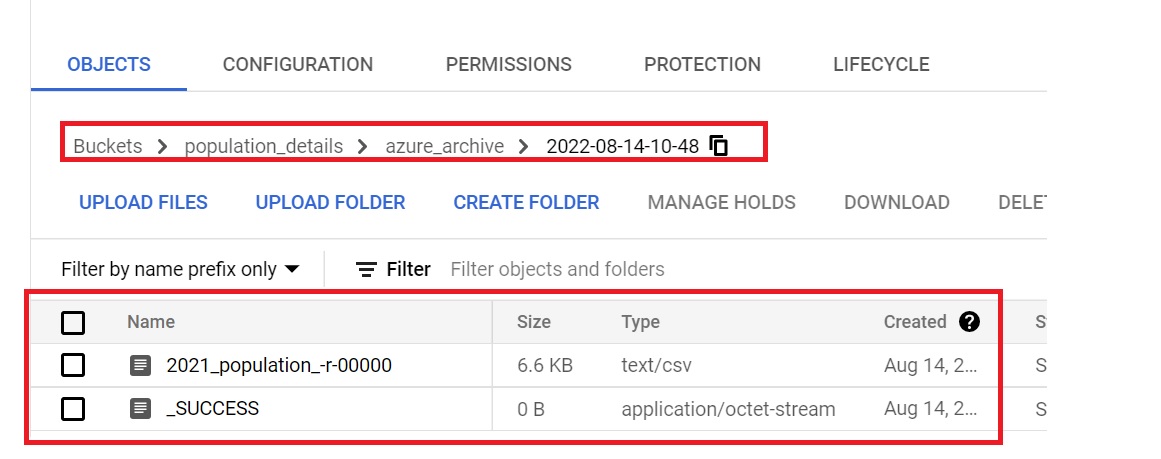
Results
Here are the results of the successful execution of pipeline.
Archive files:
BigQuery:

Conclusion
GCP Cloud Data Fusion is a powerful solution that enables you to quickly build an ETL pipeline with little to no code. Pipelines run on a data processing cluster (Spark and MapReduce). Last but not least, when making our decision, we must consider the cost of cloud fusion.
I hope you found this post useful. Feel free to leave your questions in the comments, and make sure to sign up for updates so you don’t miss the next post.


