User management on Linux systems can be tedious, and when you add in more than 10 systems the chances are it is going to take a good amount of time for you to manage user accounts on all systems individually. There are various tools available to overcome this, and all of these use LDAP in some way. The same goes for Red Hat Directory Server, which is an extension of LDAP by Red Hat to provide centralized user management. Though I have primarily demonstrated integration with Red Hat Directory Server with Linux systems, it can be used on all systems which supports LDAP authentication. You can find the official Red Hat Directory Server installation guide
here. For our test scenario I used two RHEL 5 servers named as
Server101 which is the
Red Hat Directory Server and
Server201 which is the client. For RHEL based systems you need to make sure that you are subscribed to RHDS repo for installing Red Hat Directory Server. If you are using CentOS or other derivatives you can use 389-Directory Server which is upstream for Red Hat Directory Server. Once you have the prerequisite ready you can start with installation.
 Installing RHDS[/caption]
 Once the installation is complete we can move to configuring Red Hat Directory Server.
 Now that we have installed and configured Red Hat Directory Server its not set to autostart during system boot. So we need to make Red Hat directory service and redhat directory console admin service to start at boot.
 Directory Server Admin Console GUI[/caption] The user id is directory manager which was created during directory server setup, mostly it will be default as
cn=Directory Manager. Now put your password and Administration url as
https://server101:9830. [caption id="attachment_85379" align="alignnone" width="300"]
Directory Server Admin Console GUI[/caption] The user id is directory manager which was created during directory server setup, mostly it will be default as
cn=Directory Manager. Now put your password and Administration url as
https://server101:9830. [caption id="attachment_85379" align="alignnone" width="300"]
 Directory Server Admin Console[/caption] Once you login you will be presented with console screen as below.
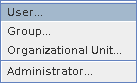
 Now click on Users and Groups tab and then click on create button, there select user from the menu.
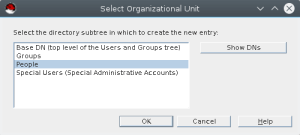
 Now Select organizational unit, mostly we will use the default and will select people from the list as below.
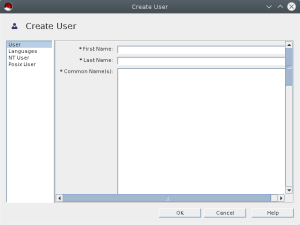
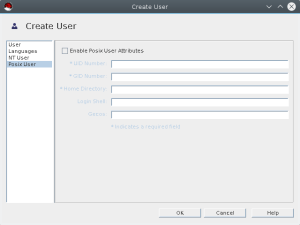
 It will open Create User menu.
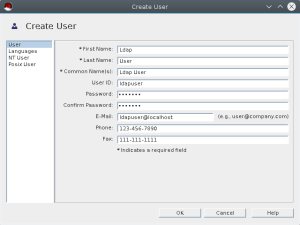
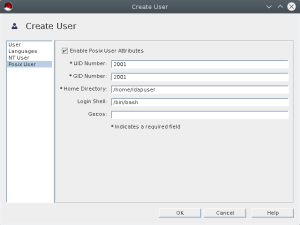
 Now we will create ldapuser account as shown below. Fill in required details. Also select posix user tab as we need the account for unix system login. Fill up required details for posix account as well.
 Now that we have created user account we can start configuring client.
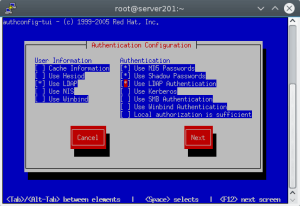
 Select Use LDAP for user information.
 Select Use LDAP Authentication.
 After this we need to make sure when user login on the server with LDAP authentication the home dir is created automatically, which is not enabled by default. We can do this by executing below command at console. [root@server201 pam.d]# authconfig --enablemkhomedir --update
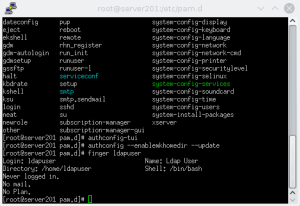 Once this is done you can now use your ldap user to login to client server. Now that we have created LDAP, we can use it to centralized login for all linux systems in the environment. The user management is easy from single location. We can also configure TLS and do replication for redundancy. We can define schema and policies as well but that is for another time.
Installing Red Hat Directory Server
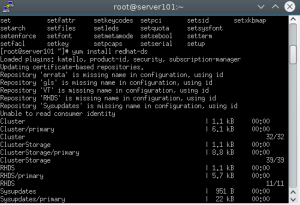
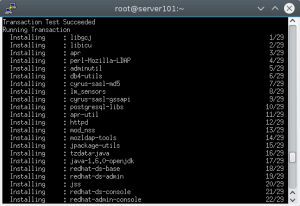
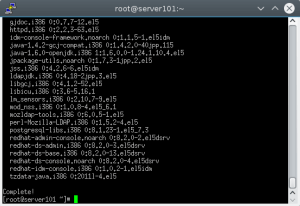
I have designated server101 as Red Hat Directory Server. Below are the steps to Install packages required for Red Hat Directory Server. [root@server101 ~]#yum install redhat-ds -y [caption id="attachment_85285" align="alignnone" width="300"] Installing RHDS[/caption]
Once the installation is complete we can move to configuring Red Hat Directory Server.
Configuring Red Hat Directory Server
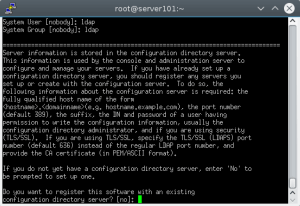
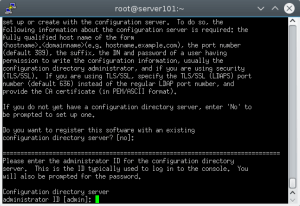
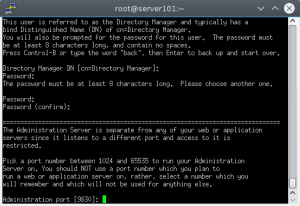
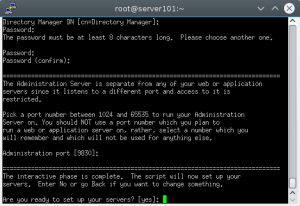
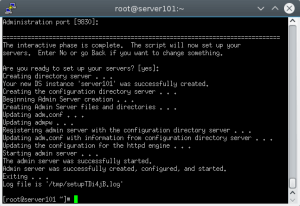
[root@server101 ~]# setup-ds-admin.plOnce you run this command you will be prompted for inputs by the setup script which are mostly straight forward. But there are few things that need to be taken care of before we proceed with the configuration. We want to run the ldap service as ldap user, so create ldap user and group if its not there. Then open the below ports on your firewall/iptables so that directory server can work properly.
- 389 for LDAP service
- 686 for secure LDAP service
- 9830 for directory server admin console connectivity
- First, check the current limit for file descriptors in /proc/sys/fs/file-max
- If the setting is lower than 64000, edit the /etc/sysctl.conf file, and reset the fs.file-max parameter and set it to 64000 or up.
- Then increase the maximum number of open files on the system by editing the /etc/security/limits.conf configuration file. Add the following entry
* - nofile 8192
Now that we have installed and configured Red Hat Directory Server its not set to autostart during system boot. So we need to make Red Hat directory service and redhat directory console admin service to start at boot.
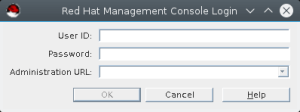
[root@server101 ~]# chkconfig dirsrv-admin --list
 dirsrv-admin 0:off1:off2:off3:off4:off5:off6:off
 [root@server101 ~]# chkconfig dirsrv --list
 dirsrv 0:off1:off2:off3:off4:off5:off6:off
 [root@server101 ~]# chkconfig dirservrv on
 [root@server101 ~]# chkconfig dirsrv-admin on
 [root@server101 ~]#
Now that we have our server ready, we need to add a user to it. We will use Directory Server admin console to connect to the GUI and will create ldap user from there. We can invoke directory server admin console gui with redhat-idm-console. It will open a GUI like below. [caption id="attachment_85377" align="alignnone" width="300"]
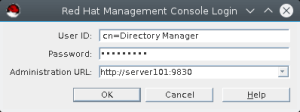
Directory Server Admin Console GUI[/caption] The user id is directory manager which was created during directory server setup, mostly it will be default as
cn=Directory Manager. Now put your password and Administration url as
https://server101:9830. [caption id="attachment_85379" align="alignnone" width="300"]
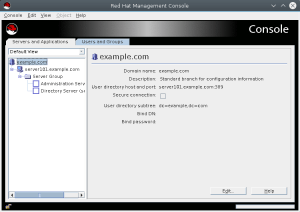
Directory Server Admin Console[/caption] Once you login you will be presented with console screen as below.
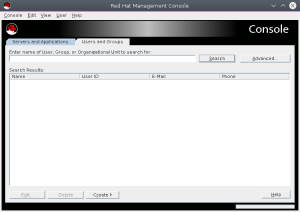
Now click on Users and Groups tab and then click on create button, there select user from the menu.
Now Select organizational unit, mostly we will use the default and will select people from the list as below.
It will open Create User menu.
Now we will create ldapuser account as shown below. Fill in required details. Also select posix user tab as we need the account for unix system login. Fill up required details for posix account as well.
Now that we have created user account we can start configuring client.
Configuring Linux client for LDAP login
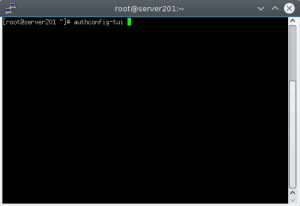
I have created server201 which we will configure for LDAP login. For that we need to execute authconfig-tui from console. It will open a terminal ui to configure authconfig to use LDAP.[root@server201 pam.d]# authconfig-tui
Select Use LDAP for user information.
Select Use LDAP Authentication.
After this we need to make sure when user login on the server with LDAP authentication the home dir is created automatically, which is not enabled by default. We can do this by executing below command at console. [root@server201 pam.d]# authconfig --enablemkhomedir --update
Once this is done you can now use your ldap user to login to client server. Now that we have created LDAP, we can use it to centralized login for all linux systems in the environment. The user management is easy from single location. We can also configure TLS and do replication for redundancy. We can define schema and policies as well but that is for another time.

