
This blog post will cover SQL Server on-premise or IaaS and Azure SQL DB and how to classify data in both. Let's start by explaining what data discovery and classification is and why is it important.
Data discovery is not a tool. It's a business user-oriented process for discovering patterns and anomalies by visually navigating data or applying advanced analytical algorithms and methods. The data discovery process is iterative and does not require extensive upfront model creation, but it can have a significant cost in terms of manual effort as we really need to have an understanding of the data being discovered. Data discovery requires skills in understanding data relationships and data modelling as well as in using data analysis and advanced analytical functions to reveal insights in the data. The goal is to understand what data we have stored and how we can leverage that data in our working business models. Once we have discovered the data, we can move on to
Data classification
Data classification is the process of organising data into categories for its most effective and efficient use. In essence "tagging" data. A well-planned data classification system makes essential data easy to find and retrieve. This can be of particular importance for risk management, legal discovery and compliance. With the recent GDPR compliance in place and the long-standing regulatory compliance such as PII, HIPPA, FEDRAMP etc., data classification has come to the forefront of many companies' data strategies. This blog post will show how Microsoft SQL Server and Azure SQL DB can help us discover and classify our data, so that at any time we will be able to know what and where our sensitive data resides.


On-premise or IaaS SQL Server
In order to use the data classification features of SQL Server, there are some requirements:- The Data Classification feature is available for SQL Server 2008 +
- The Data Classification feature requires SQL Server Management Studio (SSMS) 17.5 +
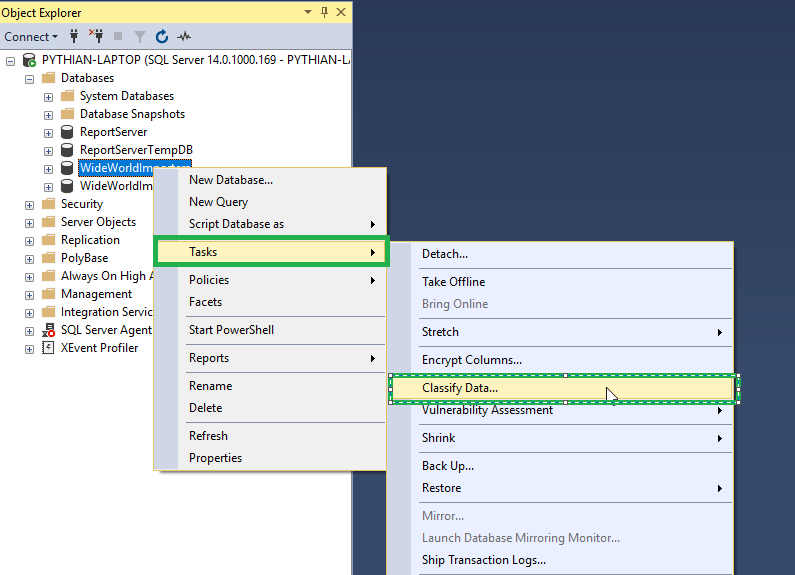
- In order to access the Data Classification feature, we need to open the database section and right click on the database we want to use. Then click Tasks and Classify Data.
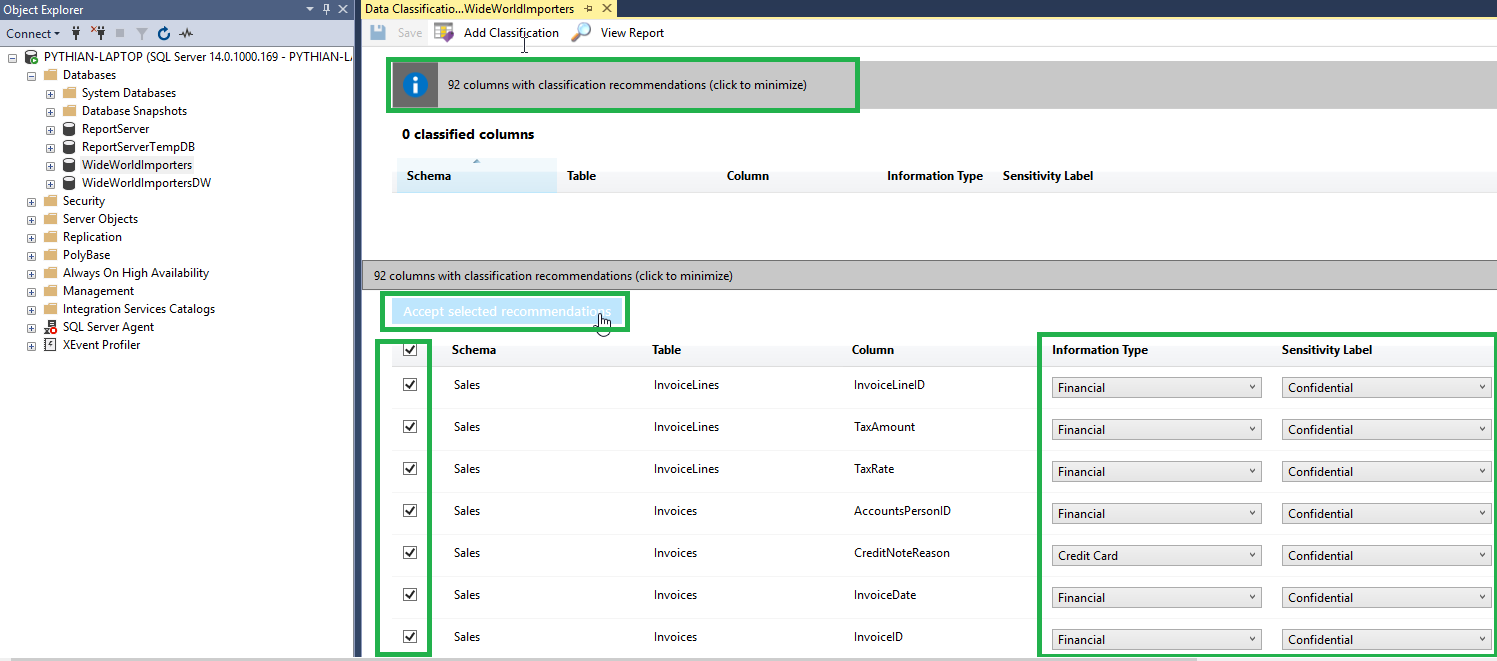
- Next, it will display a blank report as we have not yet determined the classification of our columns. In order to do this, Microsoft attempts to discover and classify the columns on our behalf. We MUST review the recommendations and confirm the classification of the columns. We can do this by clicking on this message on top of the screen. We can then go through each column to check that the information type and sensitivity level is correct. Once we are happy with classification, we can click Accept selected recommendation button. Once that is complete, we just need to click the Save button.
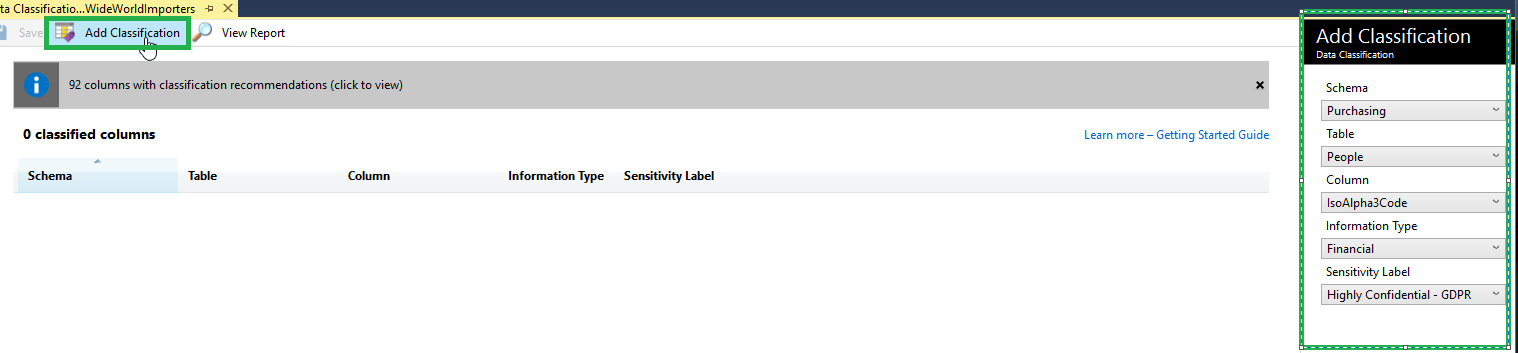
- Alternatively, we can classify columns manually by clicking on the Add Classification button and filling in the details as required.
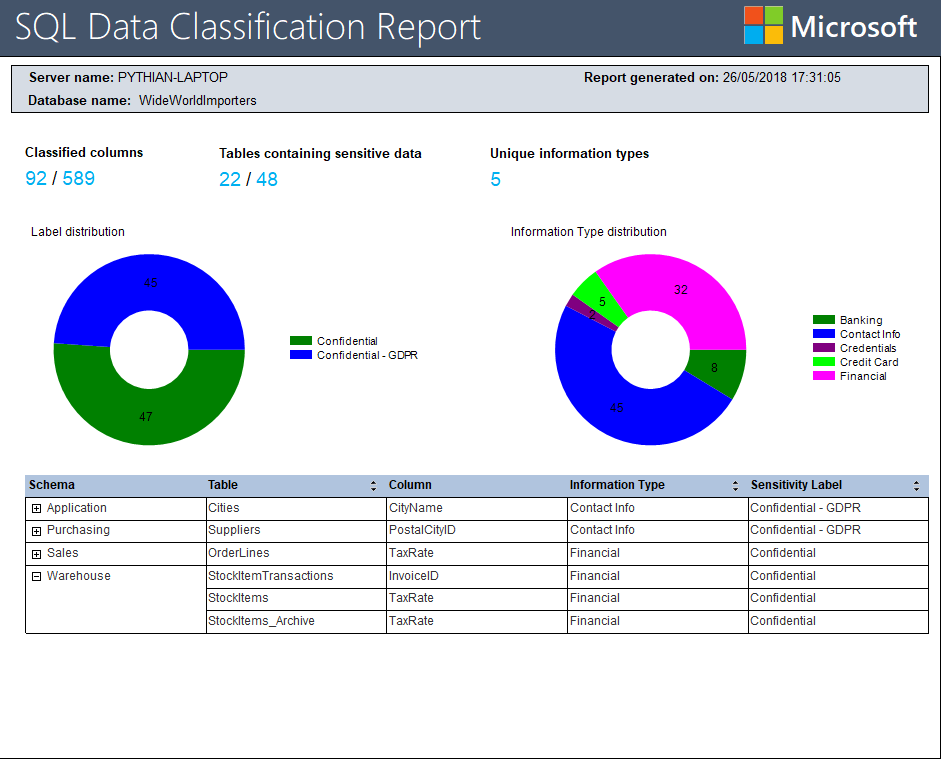
- Once we have accepted and saved the recommendations, we have successfully classified our data. We can view a nice report by clicking on the View Report Button. The report gives us some summary information regarding how many classified columns we have, how many tables we have that hold sensitive data and how many distinct information types we have. The report also gives us some attractive graphs to display the data. If needed, we can drill down and find column information in more detail towards the bottom of the report. We can also right click on the report and export to PDF, Word or Excel, which is super useful for presenting to executives.
Azure SQL DB
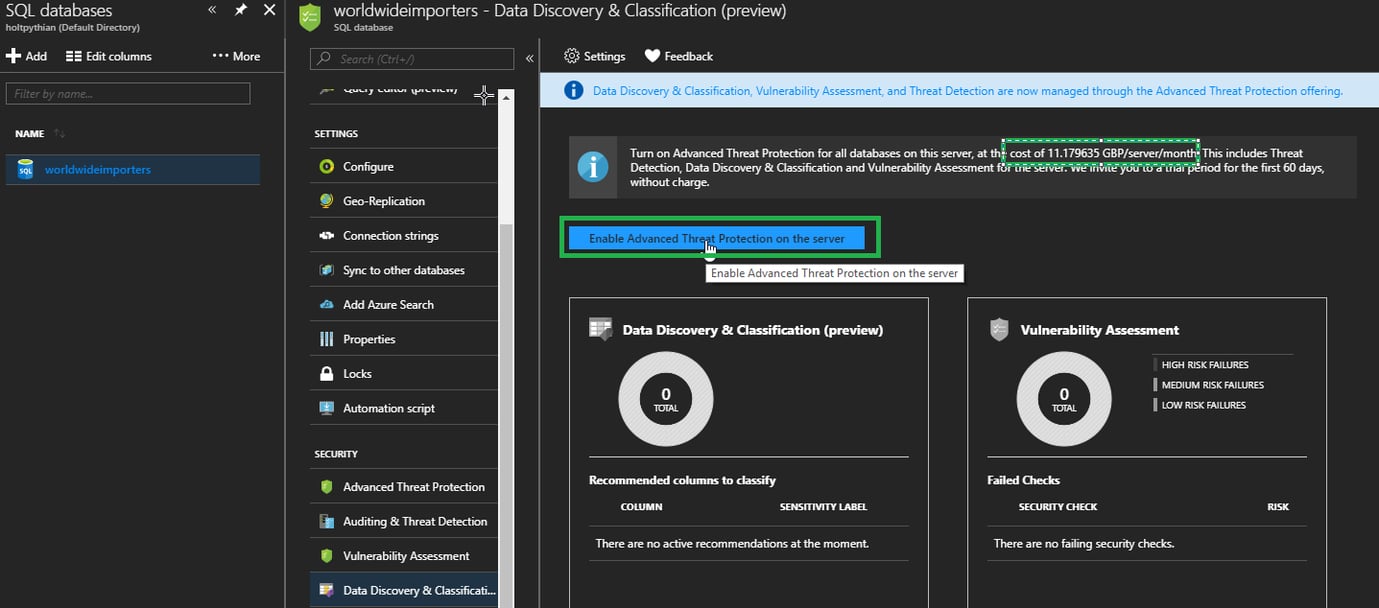
We can achieve the same result in Azure SQL DB by using the Azure portal:- First, we need to enable the Advanced Threat Protection for the database server. Please be aware there is a cost associated with this but it does offer a few benefits such as data discovery and classification, vulnerability assessment and threat detection capabilities. More information can be found here. We can enable this by clicking on the Enable Advanced Threat Detection button in the database blade of the Azure portal.
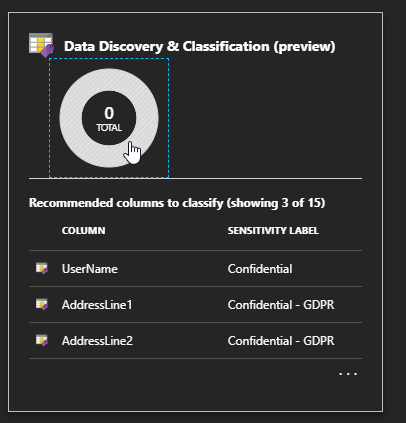
- Next, we need to click on the Data Discovery and Classification blade.
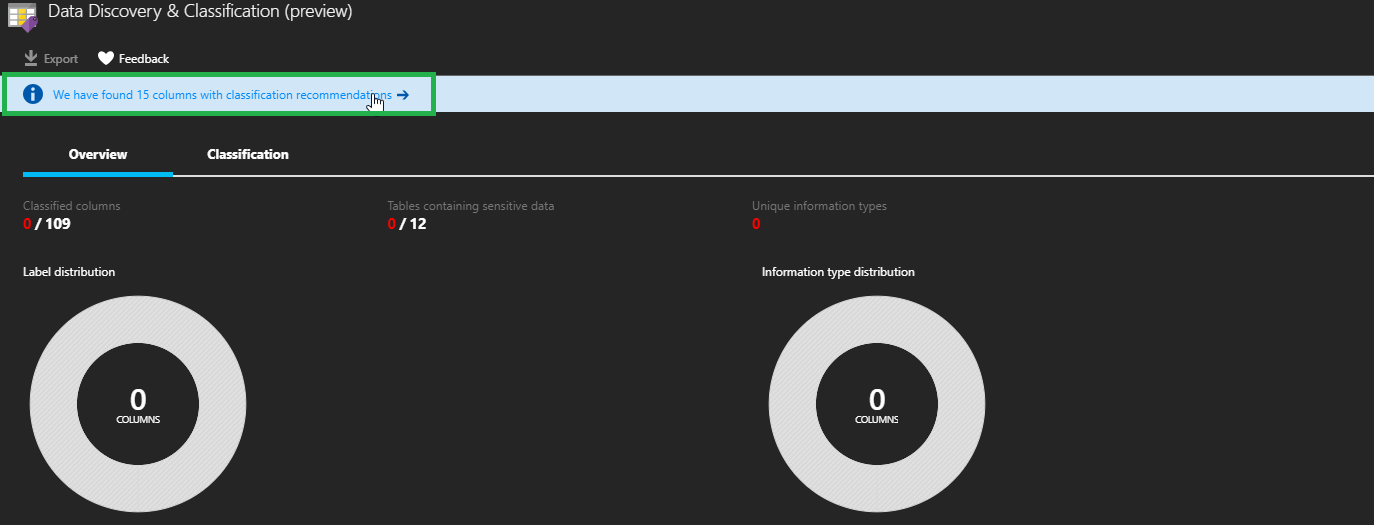
- Similar to SSMS, we must review and save the recommendations by clicking on the recommendation bar at the top of the blade.
- Now we can review, make any changes and accept the recommendations as required. After accepting the recommendation, we will need to save the classifications using the Save button.
- Alternatively, we can add our own classifications by clicking on the Add Classification button.
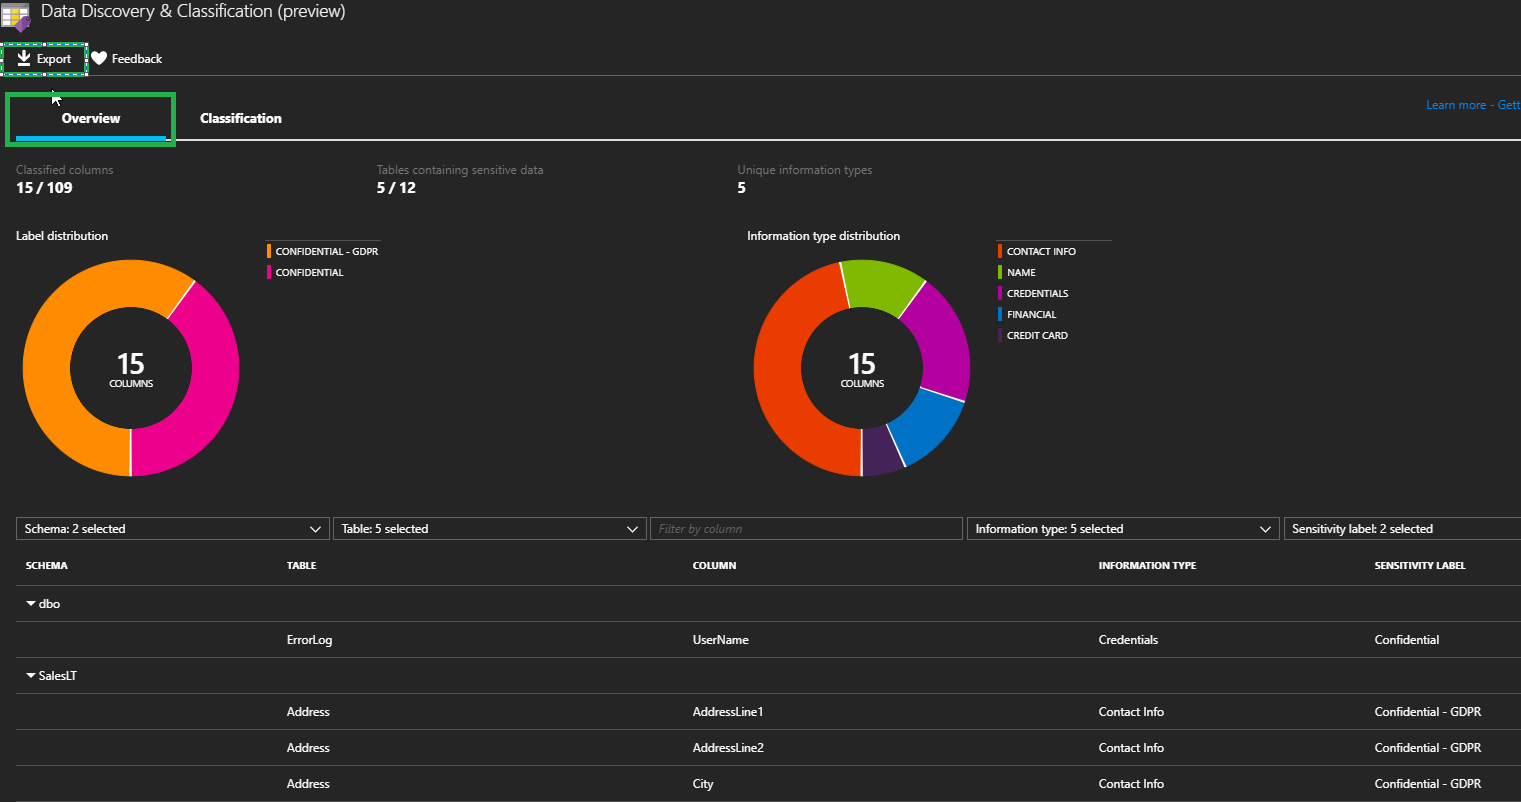
- After clicking on Save, the report is ready to be viewed and can be accessed by clicking on the Overview tab. It can also be exported using the Export button.


