
This weekend, I gave an orientation to Docker for a developer friend of mine who works in an enterprise environment and was preparing to take on new development projects using Docker. I have given several Docker 101 workshops, but it's been a while, and it was fun to hear questions from a beginner. I had just finished updating my Cassandra-Python test environment and was able to use it as an example. First, I shared my opinions on why you should use Docker instead of VMs (especially in a local test environment):

 Images are defined by Dockerfiles. These are usually named "Dockerfile" but you can name them something else as long as you specify the filename in commands. For example, in this demo, you will see there are
two Dockerfiles in the src directory... cassie-Dockerfile and opscassie-Dockerfile. You can use Dockerfiles to install tools, set environment variables, and other tasks you want to run on top of the base image. For example, in cassie-Dockerfile, several networking tools, libraries, and other helpful things are installed into the container. For a large project, you would be smart to use layers of inheritance and block organization within the Dockerfile. At the top of a Dockerfile, you will see a line starting with "FROM" that pulls in definitions from another image. For example, cassie-Dockerfile starts with the line "FROM cassandra:latest" showing that it inherits all the definitions from that Dockerfile.
Images are defined by Dockerfiles. These are usually named "Dockerfile" but you can name them something else as long as you specify the filename in commands. For example, in this demo, you will see there are
two Dockerfiles in the src directory... cassie-Dockerfile and opscassie-Dockerfile. You can use Dockerfiles to install tools, set environment variables, and other tasks you want to run on top of the base image. For example, in cassie-Dockerfile, several networking tools, libraries, and other helpful things are installed into the container. For a large project, you would be smart to use layers of inheritance and block organization within the Dockerfile. At the top of a Dockerfile, you will see a line starting with "FROM" that pulls in definitions from another image. For example, cassie-Dockerfile starts with the line "FROM cassandra:latest" showing that it inherits all the definitions from that Dockerfile.
 Viewing the sections "Supported tags and respective Dockerfiles" you can find the "latest" tag. Clicking on it, you will see the Cassandra Dockerfile code. Note: For most projects in Docker Hub, tags will link to github, but shortly we will see this is not always the case.
 The link to the Dockerfile for cassandra:latest (
https://github.com/docker-library/cassandra/blob/master/3.11/Dockerfile) starts with the line "FROM adoptopenjdk:8-jre-hotspot-bionic" so we can navigate upwards to the adoptopenjdk image page at
https://hub.docker.com/_/adoptopenjdk. Here, we won't find an easy tag link, but by clicking the link next to "Maintained by" we get to the github page and find that adoptopenjdk comes from a variety of operating systems images. Following the thread up, we see the operating system Dockerfiles are generally "FROM scratch" so we've reached the ultimate parent.
The link to the Dockerfile for cassandra:latest (
https://github.com/docker-library/cassandra/blob/master/3.11/Dockerfile) starts with the line "FROM adoptopenjdk:8-jre-hotspot-bionic" so we can navigate upwards to the adoptopenjdk image page at
https://hub.docker.com/_/adoptopenjdk. Here, we won't find an easy tag link, but by clicking the link next to "Maintained by" we get to the github page and find that adoptopenjdk comes from a variety of operating systems images. Following the thread up, we see the operating system Dockerfiles are generally "FROM scratch" so we've reached the ultimate parent.
 For another example of interdependent containers in a cluster, take a look at this combination of Cassandra and Elasticsearch:
https://blog.pythian.com/cassandra-open-source-log-analysis-kibana-using-filebeat-modeled-docker/.
For another example of interdependent containers in a cluster, take a look at this combination of Cassandra and Elasticsearch:
https://blog.pythian.com/cassandra-open-source-log-analysis-kibana-using-filebeat-modeled-docker/.

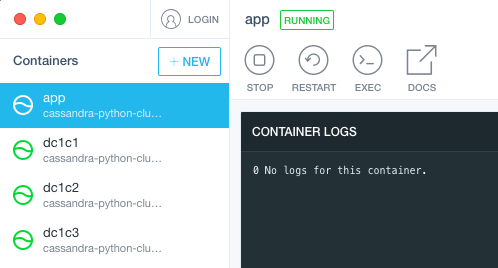
 To view the element status, settings, and logs more easily, two GUIs are available. Kitematic is the older GUI, but has a little more functionality (being able to search for images directly within the tool). The newer tool is Docker Desktop and is installed by default with the Docker download.
 And then run a small Python request:
- Docker Hub has more pre-existing images than I was ever able to find for Virtualbox. You can quickly test the functionality of your app across a variety of operating systems. It takes much less time than configuring VMs.
- Unlike VMs, Docker doesn't require a pre-allocation of host resources. For example, if I set up a 6-node cluster of Cassandra in Virtualbox using default settings, my laptop will crash.
- Networking is easier in Docker, using docker-compose configuration.
What we discussed
I gave a brief overview but mostly responded to his questions, and I've organized the responses into 6 areas below:- The basic elements: images, container, networks, volumes
- Inheritance within Dockerfiles
- How to navigate Docker Hub
- Basic elements of docker-compose.yml
- How to use Docker Desktop and Kitematic
- Simple test of the demo cluster
Basic elements of Docker
Orienting to the vocabulary is a good first task for new technology, so that's where we started. The basic elements are images (definitions), containers (you can think of these in the abstract like servers or VMs, even though they are neither), networks (allow containers to talk to each other), and volumes (useful for mapping files in and out of containers to your host, or for persisting data, logs, etc.). Images can be found at hub.docker.com as a start. Containers are created from images. The other word to know is "host" -- for this exercise, that meant a laptop.Inheritance
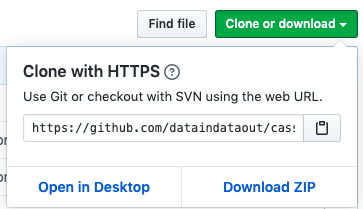
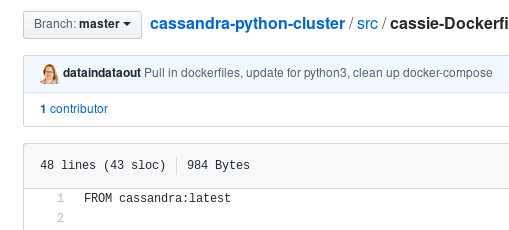
The next step, of course, is orienting to the organization of files within Docker. For this demo, we looked at https://github.com/dataindataout/cassandra-python-cluster. Images are defined by Dockerfiles. These are usually named "Dockerfile" but you can name them something else as long as you specify the filename in commands. For example, in this demo, you will see there are
two Dockerfiles in the src directory... cassie-Dockerfile and opscassie-Dockerfile. You can use Dockerfiles to install tools, set environment variables, and other tasks you want to run on top of the base image. For example, in cassie-Dockerfile, several networking tools, libraries, and other helpful things are installed into the container. For a large project, you would be smart to use layers of inheritance and block organization within the Dockerfile. At the top of a Dockerfile, you will see a line starting with "FROM" that pulls in definitions from another image. For example, cassie-Dockerfile starts with the line "FROM cassandra:latest" showing that it inherits all the definitions from that Dockerfile.
How to navigate Docker Hub
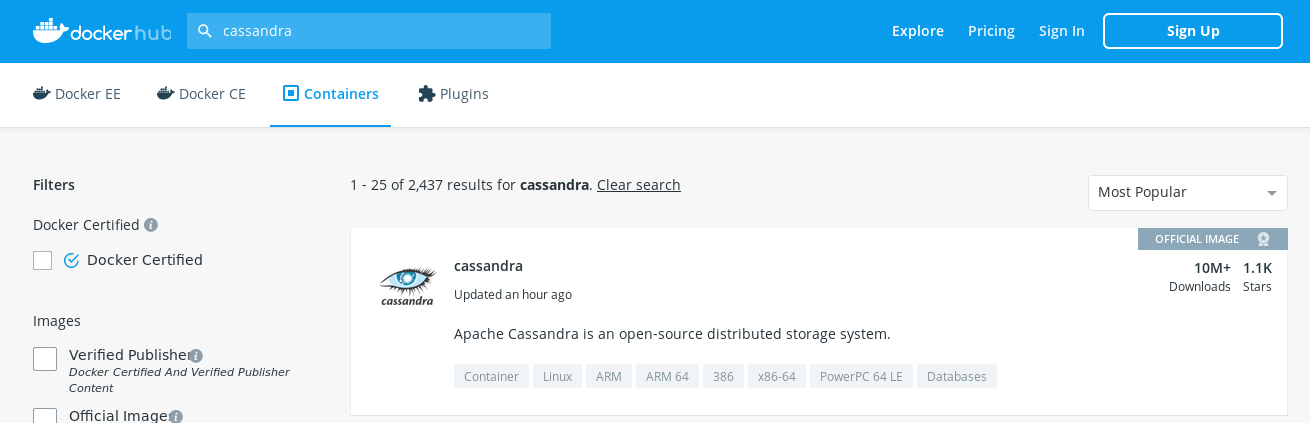
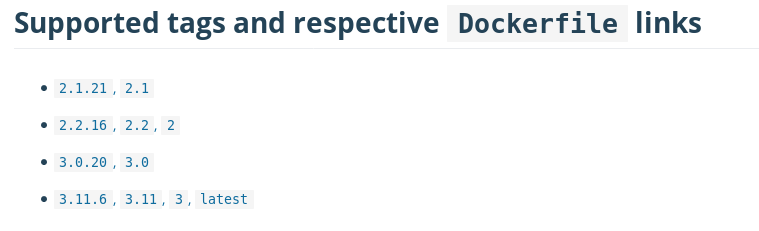
As mentioned, available images are a bonus in Docker, so we took a look at how the Docker Hub is set up. To find out what the cassandra:latest image Dockerfile looks like, we can visit hub.docker.com and search for "cassandra." (Login is not required.) Docker uses an incredible amount of permissions and can be dangerous to your underlying system, so be sure to look for Official Images or known publishers. In this case, there is an official image for Cassandra ( https://hub.docker.com/_/cassandra). Viewing the sections "Supported tags and respective Dockerfiles" you can find the "latest" tag. Clicking on it, you will see the Cassandra Dockerfile code. Note: For most projects in Docker Hub, tags will link to github, but shortly we will see this is not always the case.
The link to the Dockerfile for cassandra:latest (
https://github.com/docker-library/cassandra/blob/master/3.11/Dockerfile) starts with the line "FROM adoptopenjdk:8-jre-hotspot-bionic" so we can navigate upwards to the adoptopenjdk image page at
https://hub.docker.com/_/adoptopenjdk. Here, we won't find an easy tag link, but by clicking the link next to "Maintained by" we get to the github page and find that adoptopenjdk comes from a variety of operating systems images. Following the thread up, we see the operating system Dockerfiles are generally "FROM scratch" so we've reached the ultimate parent.
Basic elements of docker-compose.yml
The repo we used as a demo is intentionally simple but contains several elements that are useful to understanding Docker, so we took a look at the various files within. Here's the docker-compose.yml file:version: '2' services: ################################################ # application server app: container_name: app build: context: . dockerfile: ./src/opscassie-Dockerfile hostname: app networks: myring: ipv4_address: 172.16.238.10 command: tail -f /dev/null ################################################ # servers to run a Cassandra cluster on # the "CASSANDRA*" variables will get pulled in via docker-entrypoint.sh dc1c1: container_name: dc1c1 build: context: . dockerfile: ./src/cassie-Dockerfile hostname: dc1c1 networks: - myring volumes: - ./n1data:/var/lib/cassandra - ./configuration/cassandra-env.sh:/etc/cassandra/cassandra-env.sh ports: - "127.0.0.1:7401:7400" environment: - CASSANDRA_SEEDS=dc1c1,dc1c2 - CASSANDRA_CLUSTER_NAME=Dev_Cluster - CASSANDRA_ENDPOINT_SNITCH=GossipingPropertyFileSnitch - CASSANDRA_DC=DC1 - CASSANDRA_RACK=RAC1 ulimits: memlock: -1 nproc: 32768 nofile: 100000 command: bash -c 'sleep 10; /docker-entrypoint.sh cassandra -f' dc1c2: container_name: dc1c2 build: context: . dockerfile: ./src/cassie-Dockerfile hostname: dc1c2 networks: - myring volumes: - ./n2data:/var/lib/cassandra - ./configuration/cassandra-env.sh:/etc/cassandra/cassandra-env.sh ports: - "127.0.0.1:7402:7400" environment: - CASSANDRA_SEEDS=dc1c1,dc1c2 - CASSANDRA_CLUSTER_NAME=Dev_Cluster - CASSANDRA_ENDPOINT_SNITCH=GossipingPropertyFileSnitch - CASSANDRA_DC=DC1 - CASSANDRA_RACK=RAC2 depends_on: - dc1c1 ulimits: memlock: -1 nproc: 32768 nofile: 100000 command: bash -c 'sleep 10; /docker-entrypoint.sh cassandra -f' dc1c3: container_name: dc1c3 build: context: . dockerfile: ./src/cassie-Dockerfile hostname: dc1c3 networks: - myring volumes: - ./n3data:/var/lib/cassandra - ./configuration/cassandra-env.sh:/etc/cassandra/cassandra-env.sh ports: - "127.0.0.1:7403:7400" environment: - CASSANDRA_SEEDS=dc1c1,dc1c2 - CASSANDRA_CLUSTER_NAME=Dev_Cluster - CASSANDRA_ENDPOINT_SNITCH=GossipingPropertyFileSnitch - CASSANDRA_DC=DC1 - CASSANDRA_RACK=RAC3 depends_on: - dc1c1 ulimits: memlock: -1 nproc: 32768 nofile: 100000 command: bash -c 'sleep 10; /docker-entrypoint.sh cassandra -f' ######################################################## # network networks: myring: driver: bridge ipam: driver: default config: - subnet: 172.16.238.0/24You'll notice that there are 4 services: app, dc1c1, dc1c2, and dc1c3. The "app" service acts as a bastion or jump host. The three dc1* services will be a Cassandra cluster of 3 nodes. If you examine other docker-compose.yml files, you'll find a few ways to specify images within the services. One other way is to specify the image directly, as is done in this example:
...
 DC1C1:
 container_name: DC1C1
 image: cassandra:latest
 hostname: DC1C1
 networks:
 - myring
 ...
However, in the example we discussed, we will build the images with included Dockerfiles. I like this newer way of doing it because it is more flexible. You could, for example, create multiple combinations of the service versions within the cluster. (See https://github.com/paunin/PostDock for an example.)
...
 dc1c1:
 container_name: dc1c1
 build:
 context: .
 dockerfile: ./src/cassie-Dockerfile
 hostname: dc1c1
 networks:
 - myring
 ...
You can pre-build the images with the "docker build" command. If you're not building the image within a directory with a single Dockerfile named "Dockerfile" then specify the filename. For example, to build the "cassie" image, use "docker build -f cassie-Dockerfile ." on the command line. If you don't pre-build the images, that will happen as part of the docker-compose step. The first time an image is built on your computer, be prepared for it to take several minutes. There's a lot more going on in this docker-compose.yml file, but to point out two main things: The data volume for each Cassandra node is mapped to a directory on the host. For example, I can view the data for node dc1c2 inside the directory n2data inside the project directory on my laptop. Even when the container stops, the directory contents are persisted. And the configuration file is also mapped from the host to the container; this is primarily so I can use a custom cassandra-env.sh to specify a smaller HEAP than the default.
...
 volumes:
 - ./n1data:/var/lib/cassandra
 - ./configuration/cassandra-env.sh:/etc/cassandra/cassandra-env.sh
 ...
The second thing is the port mapping. The standard Cassandra port 7400 is mapped to the host as 7401, 7402, and 7403. This mapping can be very useful when you need to connect to the container from the host.
...
 ports:
 - "127.0.0.1:7401:7400"
 ...
Startup the cluster with the command "docker-compose up -d" -- the "-d" is to detach from the session, so you get your command prompt back. Unsurprisingly, "docker-compose down" will shut down the cluster.
For another example of interdependent containers in a cluster, take a look at this combination of Cassandra and Elasticsearch:
https://blog.pythian.com/cassandra-open-source-log-analysis-kibana-using-filebeat-modeled-docker/.
How to use Docker Desktop and Kitematic
Now that all the pieces are in place, and the app is running, it's nice to know how to monitor all the parts of Docker. You can view any of the 4 main elements on the command line interface with the command "docker [element] ls" -- where the element is one of image, container, network, or volume. The images have a shortcut (docker images) and containers that aren't running can be shown by appending -all to the command (docker container ls --all). Elements can similarly be removed with "docker [element] rm [identifier seen in the listing" and there is a shortcut of "docker rmi [identifier]" for removing images.
To view the element status, settings, and logs more easily, two GUIs are available. Kitematic is the older GUI, but has a little more functionality (being able to search for images directly within the tool). The newer tool is Docker Desktop and is installed by default with the Docker download.
Simple test of the Cassandra-Python cluster
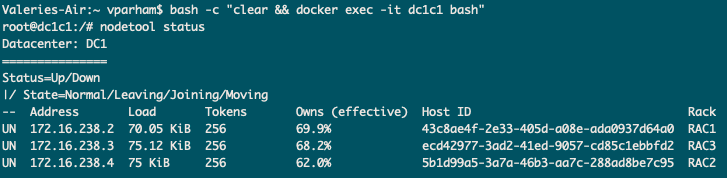
With the walkthrough done and questions answered, we could do a small test. You can connect to any container from the command line with the pattern:bash -c "clear && docker exec -it [container name] bash"Docker Desktop and Kitematic both have an "Exec" button to click to open a connection to a container, also. Once there, we can verify that the 3-node Cassandra cluster is running:
And then run a small Python request:
root@app:/# python3
 Python 3.5.2 (default, Apr 16 2020, 17:47:17)
 [GCC 5.4.0 20160609] on linux
 Type "help", "copyright", "credits" or "license" for more information.
 >>> from cassandra.cluster import Cluster
 >>> cluster = Cluster(['172.16.238.2', '172.16.238.3', '172.16.238.4'])
 >>> session = cluster.connect()
 >>> peers = session.execute('SELECT * from system.peers')
 >>> for peer in peers:
 ... print(peer.peer, peer.data_center)
 ...
 172.16.238.4 DC1
 172.16.238.2 DC1
 >>> peers = session.execute('SELECT * from system.peers')
 >>>
 >>> for peer in peers:
 ... print(peer.peer, peer.data_center)
 ...
 172.16.238.3 DC1
 172.16.238.4 DC1
This demo also shows how Cassandra distributes requests to the various nodes. My friend had a lot more questions the next day about networking, running multiple web servers on a host, and file locations, so I will share some of those answers later.


