A few years ago I wrote an article on getting started with the Oracle Database Backup Service which can be found
here. It's no surprise that in the last few years things have changed significantly. Trying to use this service in the current Oracle Cloud Infrastructure (OCI) with a new Oracle account created recently posed some issues and complexities. (For older or "traditional" cloud accounts, things may work a little differently).
This article helps explain how to get started with the Oracle Database Backup Service in July 2018. Cloud services are changing rapidly and I've found that both the online documentation and My Oracle Support (MOS) documents are out of date or no longer accurate - hence I'm trying to clarify the steps. Specifically, the problems I encountered when trying to re-implement with a new Oracle Cloud account are:
 It will then appear on the dashboard and can be selected:
 Selecting that service provides some details but not critical information about how it's being used or the REST endpoint URL:
 There's other account information not shown in the screenshot, but the critical information needed to start using the service is not displayed. Similarly, most MOS documents and online documentation currently suggest that the REST endpoint is in the format of:
 When added to the dashboard, click on the service to open up the "
Service: Oracle Cloud Infrastructure Object Storage Classic" service page. Near the bottom under
Additional Information will be the proper
REST Endpoint and
Auth V1 Endpoint to use. From the top right of the service page, you can also click on the
Open Service Console link to get to the details of the storage usage. Hence, the URL is probably something simple like:
When added to the dashboard, click on the service to open up the "
Service: Oracle Cloud Infrastructure Object Storage Classic" service page. Near the bottom under
Additional Information will be the proper
REST Endpoint and
Auth V1 Endpoint to use. From the top right of the service page, you can also click on the
Open Service Console link to get to the details of the storage usage. Hence, the URL is probably something simple like:
 This URL is also one that can be used when installing the
Oracle Database Cloud Backup Module so that RMAN backups can write to the Backup Service.
This URL is also one that can be used when installing the
Oracle Database Cloud Backup Module so that RMAN backups can write to the Backup Service.
- How to determine the correct REST endpoint URL to use with the RMAN backup module?
- Navigating to the Classic storage service when signing up with OCI.
- How to create storage containers for the cloud backup programmatically using cURL?
OCI but with classic storage
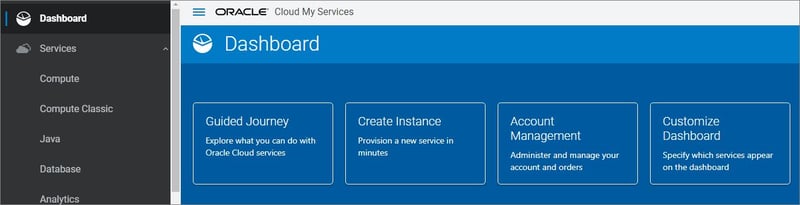
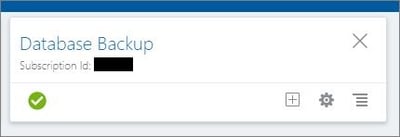
The first thing that isn't overly clear is the fact that for modern (recently created) Oracle Cloud accounts, the Backup Service can be added to the OCI Dashboard but interestingly, it does not appear in the service list. To add, choose Customize Dashboad (rightmost box) and then choose Database Backup from the Data Management section: It will then appear on the dashboard and can be selected:
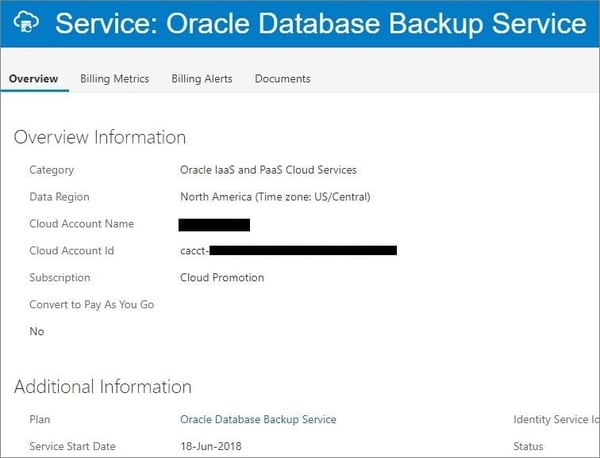
Selecting that service provides some details but not critical information about how it's being used or the REST endpoint URL:
There's other account information not shown in the screenshot, but the critical information needed to start using the service is not displayed. Similarly, most MOS documents and online documentation currently suggest that the REST endpoint is in the format of:
https://myDomain.storage.oraclecloud.com/v1/myService-myDomain However, if your Oracle Cloud account was created recently, it likely will not be in formatted that way and instead, will use a URL that starts with, or includes, a region-specific sub-domain. The trick to finding the actual REST endpoint URL is to recognize that the Database Backup Service still uses Oracle Cloud Classic object storage.
The quick solution: add the region to the REST URL
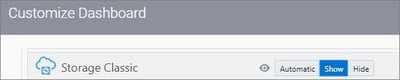
The region is probably pretty easy to guess (i.e. "us" or "em") however to determine the proper URL with accuracy, the easiest thing to do is to determine it from the Classic Storage service dashboard. Again, choose to customize the dashboard and this time, choose to add Storage Classic: When added to the dashboard, click on the service to open up the "
Service: Oracle Cloud Infrastructure Object Storage Classic" service page. Near the bottom under
Additional Information will be the proper
REST Endpoint and
Auth V1 Endpoint to use. From the top right of the service page, you can also click on the
Open Service Console link to get to the details of the storage usage. Hence, the URL is probably something simple like:
https://myDomain.us.storage.oraclecloud.com/v1/Storage-myDomain
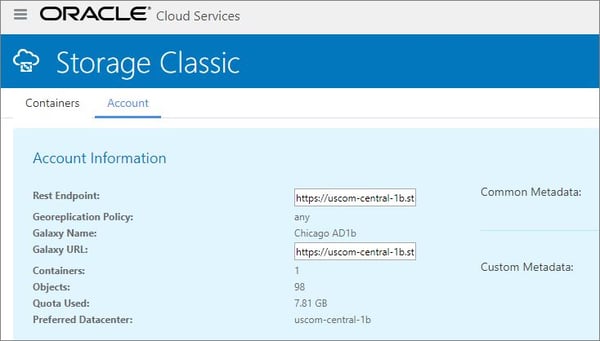
An alternate URL also exists on the Storage Service Console
To make matters a little more confusing, an alternate but still usable URL can be obtained from the storage service page. First, navigate to the Storage Service Console page. Either by choosing the Open Service Console button from the top right (in the blue bar) from the " Service: Oracle Cloud Infrastructure Object Storage Classic" page or by choosing it in the black navigation menu on the left. Under the Account tab, we can see the REST endpoint URL for the Storage Service which also can be used: This URL is also one that can be used when installing the
Oracle Database Cloud Backup Module so that RMAN backups can write to the Backup Service.
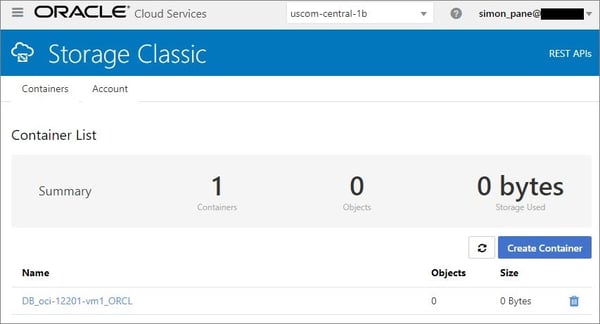
Creating storage containers
The next challenge is how to create your own storage containers within the service. You may want to create storage containers to logically divide the cloud backups by department, business unit, server, or even database. Creating a container is rather straightforward from the Storage Classic service web page as shown previously - just use the Containers tab. But it's more challenging if you want to use scripted or manual cURL commands and REST. Which may be necessary if you have a large deployment. Oracle provides the MOS document " Step-by-Step procedure to place On-Premise Database backup on Oracle Cloud (Doc ID 2225766.1)" to complement the online documentation. But again the URL format provided does not work for modern Oracle Cloud accounts. To create the required authorization token, the cURL command required is actually:curl -i -X GET https:///auth/v1.0 -H 'X-Storage-User: Storage-:' -H 'X-Storage-Pass: 'The catch here is to use the base URL from your REST endpoint (as determined previously). For example: https://uscom-central-1b.us.storage.oraclecloud.com/auth/v1.0 Example output:
$ curl -i -X GET https://uscom-central-1b.us.storage.oraclecloud.com/auth/v1.0 -H 'X-Storage-User: Storage-*********:simon_pane@********' -H 'X-Storage-Pass: *********'
 HTTP/1.1 200 OK
 date: 1532712571246
 X-Auth-Token: AUTH_tkabf61211e7cfe0a3******************
 X-Storage-Token: AUTH_tkabf61211e7cfe0a3******************
 X-Storage-Url: https://uscom-central-1b.storage.oraclecloud.com/v1/Storage-*********
 Content-Length: 0
 Server: Oracle-Storage-Cloud-Service
You can then use the
X-Auth-Token and
X-Storage-Url values returned from the above command to create the desired storage container:
$ curl -v -s -X PUT -H "X-Auth-Token: AUTH_tkabf61211e7cfe0a3******************" https://uslecloud.com/v1/*********/DB_`hostname -s`_${ORACLE_SID}
 * About to connect() to uscom-central-1b.storage.oraclecloud.com port 443 (#0)
 * Trying 129.150.7.1...
 * Connected to uscom-central-1b.storage.oraclecloud.com (129.150.7.1) port 443 (#0)
 * Initializing NSS with certpath: sql:/etc/pki/nssdb
 * CAfile: /etc/pki/tls/certs/ca-bundle.crt
 CApath: none
 * SSL connection using TLS_ECDHE_RSA_WITH_AES_128_GCM_SHA256
 * Server certificate:
 * subject: CN=*.storage.oraclecloud.com,OU=Oracle CSEC CHICAGO,O=Oracle Corporation,L=Redwood City,ST=California,C=US
 * start date: Sep 11 00:00:00 2017 GMT
 * expire date: Dec 11 23:59:59 2018 GMT
 * common name: *.storage.oraclecloud.com
 * issuer: CN=Symantec Class 3 Secure Server CA - G4,OU=Symantec Trust Network,O=Symantec Corporation,C=US
 > PUT /v1/Storage-*********/DB_oci-12201-vm1_ORCL HTTP/1.1
 > User-Agent: curl/7.29.0
 > Host: uscom-central-1b.storage.oraclecloud.com
 > Accept: */*
 > X-Auth-Token: AUTH_tkabf61211e7cfe0a3******************
 >
 < HTTP/1.1 201 Created
 < X-Last-Modified-Timestamp: 1532712939.95273
 < X-Trans-Id: txfbe0422b4a5e4fe08f411-***************
 < Content-Length: 0
 < Date: Fri, 27 Jul 2018 17:35:40 GMT
 < Server: Oracle-Storage-Cloud-Service
 <
 * Connection #0 to host uscom-central-1b.storage.oraclecloud.com left intact
And the new container can be confirmed from the Web UI, if required:
Installing and backing up using the Oracle Database Cloud backup module
Now that the REST endpoint URL has been determined and the storage container created, the rest of the deployment is straightforward and follows the documented procedures. Install using the REST endpoint URL and use the -container option to specify the container to use:$ java -jar opc_install.jar \
> -serviceName Storage \
> -identityDomain ******** \
> -host https://uscom-central-1b.storage.oraclecloud.com/v1/Storage-******** \
> -opcId 'simon_pane@********' \
> -opcPass '********' \
> -walletDir $ORACLE_HOME/dbs/opc${ORACLE_SID} \
> -libDir ${ORACLE_HOME}/lib \
> -container DB_`hostname -s`_${ORACLE_SID}
Oracle Database Cloud Backup Module Install Tool, build 12.2.0.1.0DBBKPCSBP_2018-06-12
Oracle Database Cloud Backup Module credentials are valid.
Backups would be sent to container DB_oci-12201-vm1_ORCL.
Oracle Database Cloud Backup Module wallet created in directory /u01/app/oracle/product/12.2.0.1/dbhome_1/dbs/opcORCL.
Oracle Database Cloud Backup Module initialization file /u01/app/oracle/product/12.2.0.1/dbhome_1/dbs/opcORCL.ora created.
Downloading Oracle Database Cloud Backup Module Software Library from file opc_linux64.zip.
Download complete.
$
Adjust the RMAN settings:
$ echo "configure channel device type sbt parms='SBT_LIBRARY=libopc.so,SBT_PARMS=(OPC_PFILE=${ORACLE_HOME}/dbs/opc${ORACLE_SID}.ora)';" | rman target=/

 Recovery Manager: Release 12.2.0.1.0 - Production on Fri Jul 27 19:33:58 2018
 Copyright (c) 1982, 2017, Oracle and/or its affiliates. All rights reserved.
 connected to target database: ORCL (DBID=1509082029)

 RMAN>
 using target database control file instead of recovery catalog
 new RMAN configuration parameters:
 CONFIGURE CHANNEL DEVICE TYPE 'SBT_TAPE' PARMS 'SBT_LIBRARY=libopc.so,SBT_PARMS=(OPC_PFILE=/u01/app/oracle/product/12.2.0.1/dbhome_1/dbs/opcORCL.ora)';
 new RMAN configuration parameters are successfully stored

 RMAN>

 Recovery Manager complete.
 $ echo "configure default device type to sbt;" | rman target=/

 Recovery Manager: Release 12.2.0.1.0 - Production on Fri Jul 27 19:33:59 2018
 Copyright (c) 1982, 2017, Oracle and/or its affiliates. All rights reserved.
 connected to target database: ORCL (DBID=1509082029)

 RMAN>
 using target database control file instead of recovery catalog
 new RMAN configuration parameters:
 CONFIGURE DEFAULT DEVICE TYPE TO 'SBT_TAPE';
 new RMAN configuration parameters are successfully stored

 RMAN>

 Recovery Manager complete.
 $ echo "configure controlfile autobackup on;" | rman target=/

 Recovery Manager: Release 12.2.0.1.0 - Production on Fri Jul 27 19:34:00 2018
 Copyright (c) 1982, 2017, Oracle and/or its affiliates. All rights reserved.
 connected to target database: ORCL (DBID=1509082029)

 RMAN>
 using target database control file instead of recovery catalog
 new RMAN configuration parameters:
 CONFIGURE CONTROLFILE AUTOBACKUP ON;
 new RMAN configuration parameters are successfully stored

 RMAN>

 Recovery Manager complete.
 $
And finally, run a backup remembering to include backup encryption:
$ read -s BUpassword
 $ echo -e "set encryption on identified by \$BUpassword\" only;\nbackup database plus archivelog;"" | rman target=/