
In this article I am going to go through a typical install of SQL Server 2016, and explain some of the best practices to follow when setting up a production server. I will also take a look at the new features when installing SQL Server 2016 compared to older versions. The version of SQL Server I am using in SQL Server 2016 RC2. That means that some of the features may change between the time of writing and the retail release of SQL Server 2016.
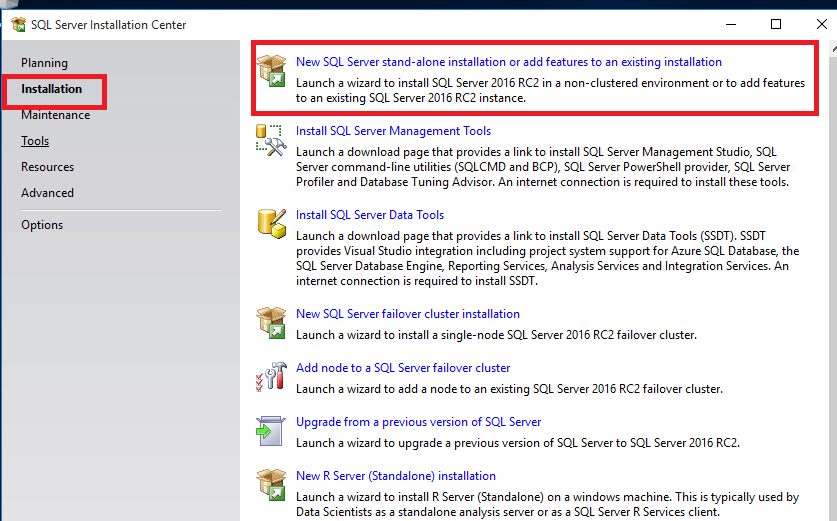
Let’s Get Started! The first screen you come to after opening the installation media:

 New for SQL Server 2016
 New for SQL Server 2016
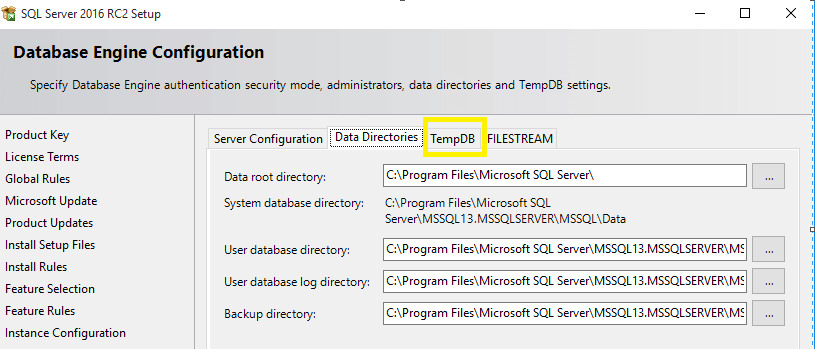
 This is the screen where you set up all of your default directories for your databases. Best practice states that we should put Log files on separate disks to Data Files, as there are two different access patterns for these, so they would be more performant on separate disks. Backups should also be on their own disks where possible. Additionally, the OS should also have its own drive separate from all SQL server files. As this is a test server and I only have a c drive, I will leave them as default. Click TempDB tab when ready.
 New For SQL 2016
 Here is a great
l
ink on some of the new features available in SQL Server 2016
Here is a great
l
ink on some of the new features available in SQL Server 2016
- Click the Installation button highlighted, and then the first option in the list New SQL Server Standalone Installation.
- SQL Server Management Tools can now be installed from this screen. The files and binaries will be downloaded when you click this link, as they are no longer bundled with the installation media.
- SQL Server Data Tools can also be installed from this screen.
- Additionally, a standalone instance of R can be installed. R is a statistical programming language embedded into SQL server 2016, making it easy for data scientists and BI professionals to get a good level of analysis without leaving the SQL Server environment.
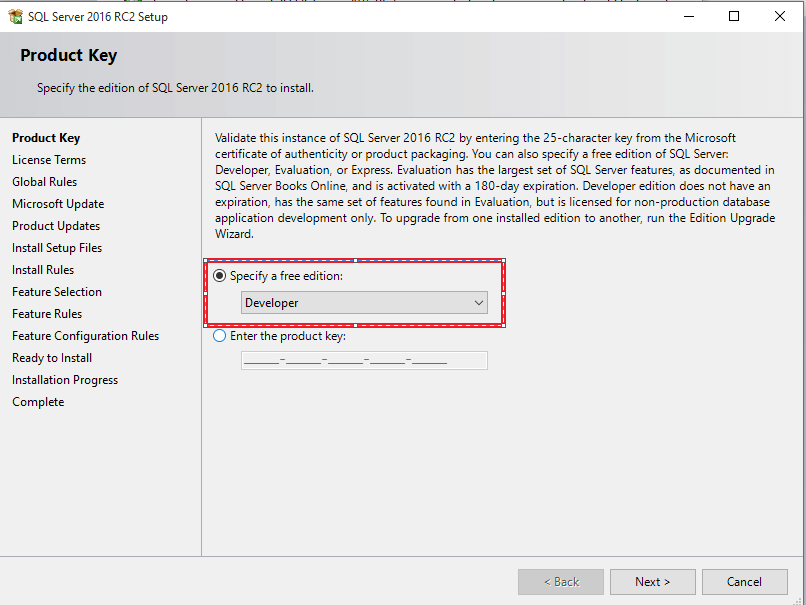
- Select the edition of SQL SERVER you would like you would like to install, I chose developer as it’s a full featured installation of SQL Server that can be used for development only, and not in a production environment. You could also enter a key in here instead of selecting a version.
- Read and accept the licence.
- SQL Server will then check a few rules to make sure you can install SQL server on your hardware.
- Select whether or not to allow Microsoft to check for updates and click next.
- SQL Server Installation will then install some setup files needed for installation and perform a few more checks. As you can see below, a warning has appeared asking me to make sure the correct ports are open on the firewall. Click Ok and then Next to proceed with the installation.
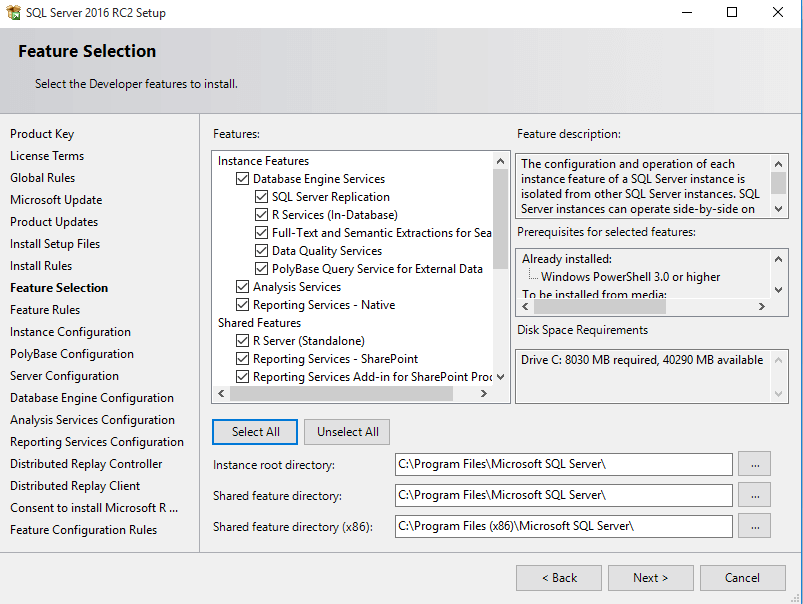
- The next screen is where we want to select all the features we want to install. As my machine is being set up as a dev machine to test SQL 2016 features, I am installing all the features. In a production environment only install the features that are needed. You can also select where to install the binaries and the root instance from this screen. Click next once you have selected the settings needed.
New for SQL Server 2016
- The ability to install a standalone instance of R is now available in the Shared Features Section.
- The ability to install R services in the database engine is now available.
- The ability to install Polybase Query Service for external sources is now available to install. Polybase query service allows users to query big data sources such as Hadoop using common T-SQL statements. If you are planning on installing the Polybase feature, then the Java Runtime SRE needs to be installed first.
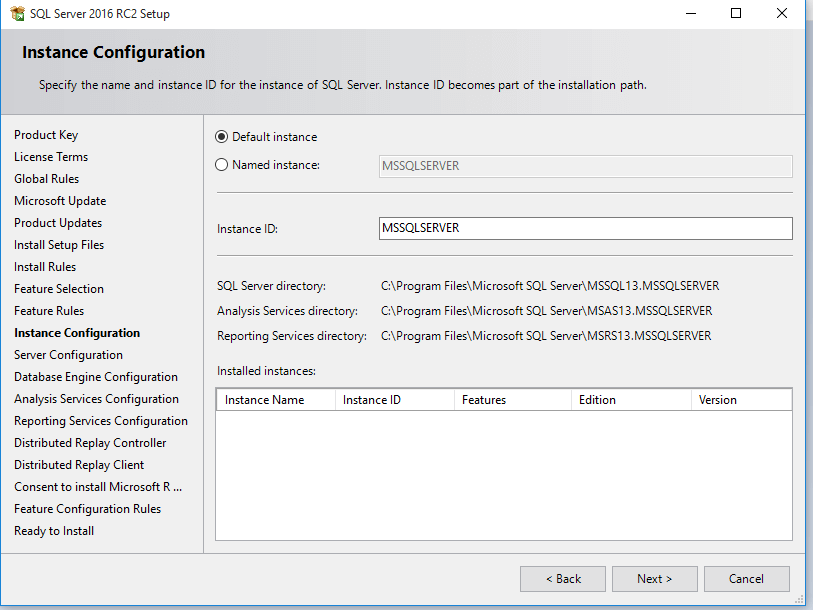
- The next screen is where you will need to name the instance, if this is not the only SQL server installation on this hardware. It also confirms the installation directory as per the previous screens. As this is the only installation of SQL Server on this machine, I am going to leave these settings as default. Click next when ready to proceed.
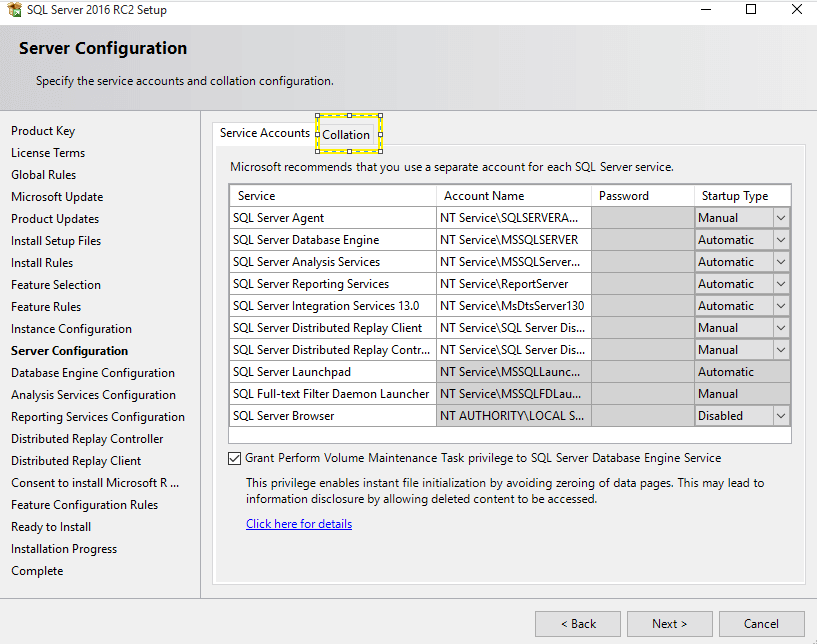
- The Next Screen is the Server Configuration screen. You should run each service under a domain account with a strong password. Whether you use managed accounts or do not enforce password expiration is up to you. However, these accounts are going to be running your services and should always be available. As this is a test machine not connected to a domain, I will leave the defaults. You can also select your default server collation from this window by clicking on the tab at the top highlighted in yellow. It is important also to set the start-up type parameters to allow services to start automatically on reboot if needed.
New for SQL Server 2016
- The ability to allow Perform Volume Maintenance tasks to be checked from the Server Configuration Screen.
- Next up is the database configuration screen, and we are going to step through the tables.
This is the screen where you set up all of your default directories for your databases. Best practice states that we should put Log files on separate disks to Data Files, as there are two different access patterns for these, so they would be more performant on separate disks. Backups should also be on their own disks where possible. Additionally, the OS should also have its own drive separate from all SQL server files. As this is a test server and I only have a c drive, I will leave them as default. Click TempDB tab when ready.
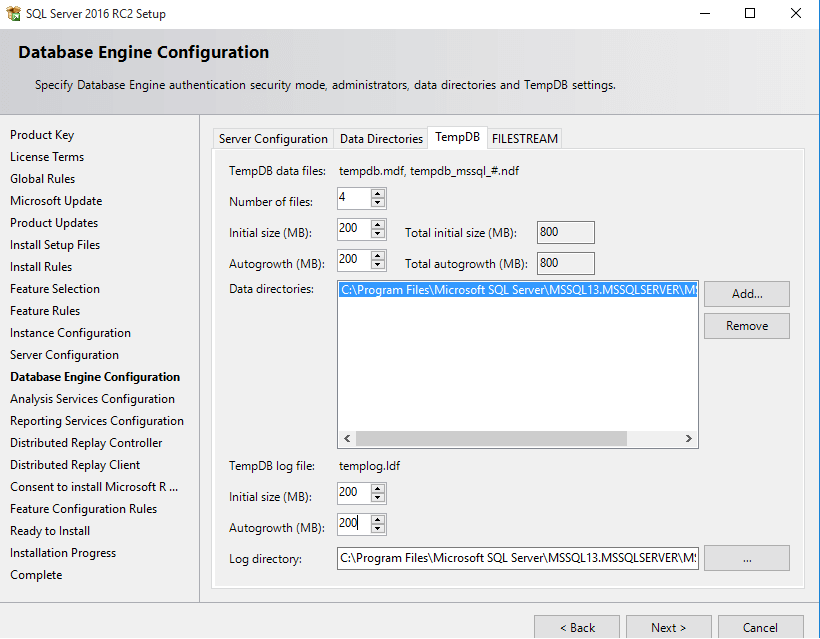
New For SQL 2016
- This is new in SQL 2016, and previously had to be configured after install. This screen allows us to create files for temp db. Best practice stated there should be 1 file per logical core up to a maximum of 8 as I have 4 cores in my machine I have created 4 files. You can also spread the files over more than one disk if needed. Once you’re happy with your selections click next.
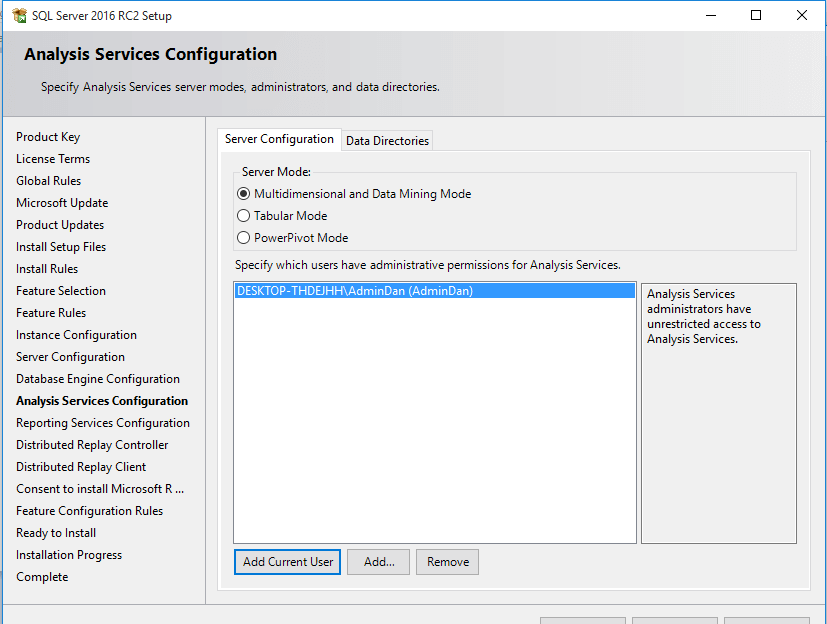
- The next screen is to configure Analysis Services. I have configured mine in Multidimensional mode adding myself as sysadmin and setting directories using same best practice as database engine. Look out for a further blog article on SQL server Analysis Services.
- Leave the default options for Reporting Services. Again keep an eye out for another article on Reporting Services.
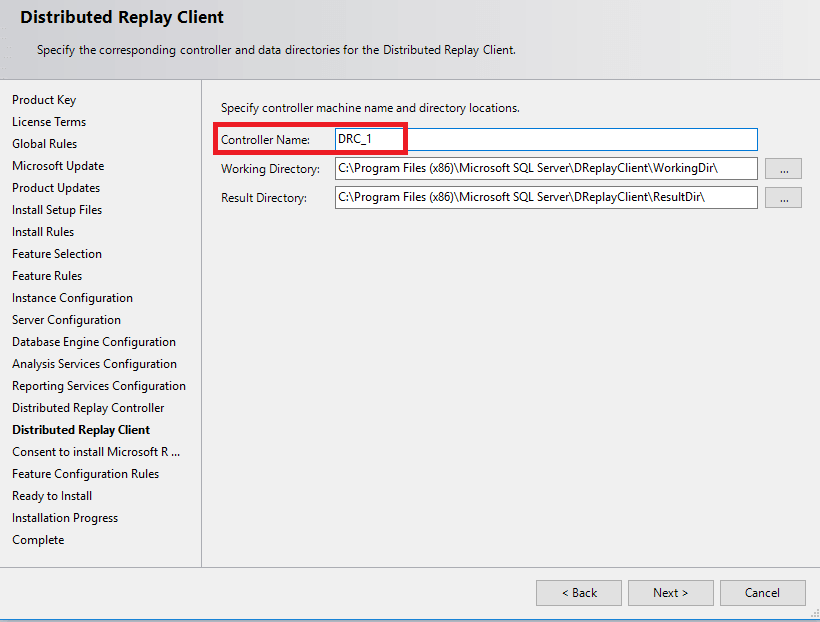
- In the next screen you have to configure the users capable of using the Distributed Replay Controller.
- Give a name to the DRC.
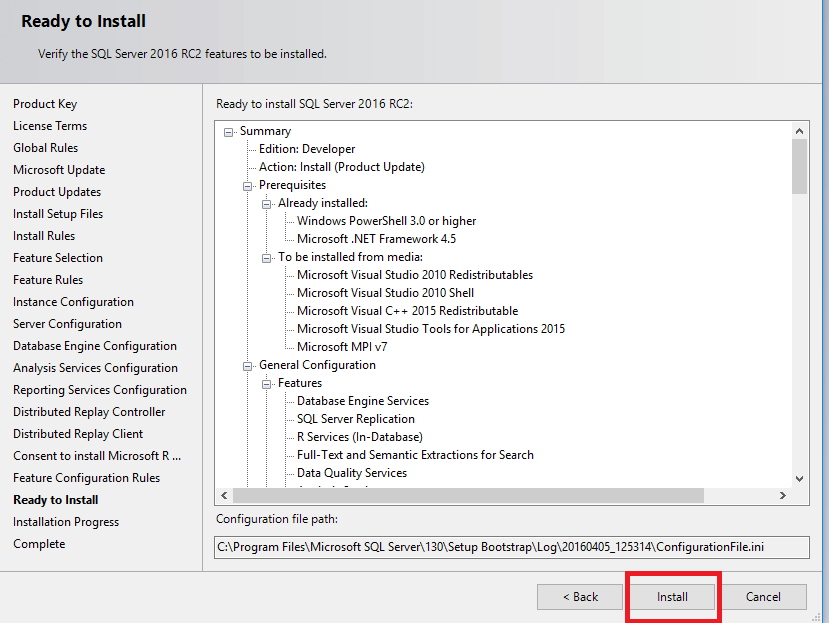
- On the next Screen you will need to accept the terms of the features being installed by clicking accept, and then next.
- Finally, you can click install and that’s it! SQL Server 2016 and all its new features are installed.
Here is a great
l
ink on some of the new features available in SQL Server 2016


