The following recommendations for best practices were extracted from this Oracle document:
Create a new Incident Rule for monitoring all EM components and set up the notifications to be sent to the EM administrator(s). The notification methods available can create or update an incident, send an email or forward to an event connector. To set up the incident rule set follow the steps below. Note that each individual rule in the rule set can have different actions configured.
- To create an incident rule for monitoring the EM components, click on Setup / Incidents / Incident Rules. On the All Enterprise Rules page, click on the out-of-box rule called “Incident management Ruleset for all targets” and then click on the Actions drop down list and select “Create Like Rule Set…”
- For the rule set name, enter a name such as MTM Ruleset. Under the Targets section, select “Specific targets” and select “Targets” from the Add drop down list. Click on the "+" sign. Click on the drop down arrow for Target Type and deselect all target types except EM Service and OMS and Repository. Click "Search". Select the targets returned and click "Select". The selected targets will be populated under the Specific targets section.
- Scroll down to the Rules section. To edit a rule, click on the rule name and click on Edit as seen below
- Modify the following rules:
a) Create incident for critical metric alerts
i) Leave the Type set as is but click on “Advanced Selection Options” and change the Severity to add Warning by clicking on the drop down list and selecting “Warning”. Click Next.
ii) You can add or modify the actions as required (i.e. add email notifications). Click Continue and then click Next.
iii) Leave the Name and description the same and click Next.
iv) Click Continue on the Review page.
b) Incident creation rule for down and agent unreachable availability status for agents and hosts.
i) Leave the Type set as is but add EM Service and OMS and Repository by clicking on the “+Add” option. From the drop down list for Target Type, select "EM Service" and click on Down, Agent Down, Agent Unreachable“ and Metric error detected. Click OK. Repeat using OMS and Repository for the Target Type. Under the Advanced Selection Options, click on the drop down list for Target Type and add both EM Service and OMS and Repository. Click Next.
ii) You can add or modify the actions as required (i.e. add email notifications) Click Continue and then click Next.
iii) Leave the Name and description the same and click Next.
iv) Click Continue on the Review page.
c) Incident creation rule for a Target Down availability status.
i) Leave the Type set as is but add EM Service and OMS and Repository by clicking on the “+Add” option. From the drop down list for Target Type, select "EM Service" and click on Down, Agent Down, Agent Unreachable“ and Metric error detected. Click OK. Repeat using OMS and Repository for the Target Type. Click Next.
ii) You can add or modify the actions as required (i.e. add email notifications) Click Continue and then click Next.
iii) Leave the Name and description the same and click Next.
iv) Click Continue on the Review page.
- Modify the actions for any other rule as required and be sure to click the “Save” push button to save the rule set or all changes will be lost.
b) Configure Always On Monitoring for Critical Target NotificationAlways-On Monitoring (AOM) provides customers with the capability of receiving critical target status and metric alerts on a controlled list of targets. This is very useful during EM planned downtime. AOM requires its own repository and can be setup with multiple AOM instances for high availability.
Setup AOM and leave running so that notifications can be enabled before an EM planned downtime. For the setups on setting up AOM, refer to the Always-On Monitoring chapter in the Enterprise Manger Cloud Control Administrator’s Guide.
c) Configure Out-of-Bound Notifications for EM AgentOut-of-Bound notifications act as a backup when there’s a complete EM outage or a repository database issue. This is configured on the agent of the OMS server and can be used to send emails or execute another script that would create a trouble ticket. It will send notifications about the following issues:
Repository Database down All OMS are down Repository side collection job that is broken or has an invalid schedule Notification job that is broken or has an invalid schedule Recommendation: To setup Out-of-Band Notifications, refer to the Document 1472854.1 - How To Setup Out Of Bound Email Notification In 12c. Note that even though this note was created for EM 12c, it is still applicable and works in EM 13c
Automatic incident creation on third-party systems using SNMP Traps (ServiceNow)
OEM is capable of integrating with third-party IT services management (ITSM) systems such as ServiceNow for example, which will be used to demonstrate the SNMP Traps integration.
To allow Oracle Enterprise Manager (OEM) to send SNMP Traps to ServiceNow, set up an SNMP Listener using an MDI Server connected to the ServiceNow instance.
The installation of the MID Server requires you to satisfy certain connection prerequisites and create a MID Server user before you download and install the MID Server service on a host machine.
You can perform the installation prerequisites and install the MID Server manually or use the MID Server Guided Setup utility, which streamlines the entire process and allows you to set up a basic MID Server quickly.
The manual process requires these setup tasks, performed in the order shown here:
Procedure
-
- Configure the network to allow MID Server network connectivity to the ServiceNow instance over TCP port 443.
- Navigate to System Properties > Web Services.
- Select the check box for Require basic authorization for incoming SOAP requests.
- Click Save.
- To provide basic authentication credentials for a MID Server, navigate to C:\Program Files\ServiceNow\<MID Server name>\agent and edit the xml file, as follows:
- Find the element <parameter name="mid.instance.username" value=""/> and enter the instance administrator user name as the value.
- For example, you might enter <parameter name="mid.instance.username" value="admin"/>.
- Find the element <parameter name="mid.instance.password" value=""/> and enter the configured password for this instance as the value.
- For example, you might enter <parameter name="mid.instance.password" value="abc123"/>.
- Navigate to System Web Services > Scripted Web Services > Scripted SOAP Services.
- Confirm that the following web services are active:
- GetMIDInfo
- InstanceInfo
- MIDAssignedPackages
- MIDFieldForFileProvider
- MIDFileSyncSnapshot
- MIDServerCheck
- MIDServerFileProvider
- Navigate to list and verify that the InstanceInfo public page is active to allow the MID Server to validate its version.
- Make sure that the MID Server computer can access servicenow.com.
- Create the MID Server user and grant that user the mid_server role.
- From the instance, navigate to User Administration > Users.
- Click New.
- Complete the fields in the form.
Field Description User ID The same user ID that will be specified in themid.instance.username parameter of config.xml. If you use special characters, such as an ampersand (&), you must encode the special character using character references in the config.xml file. First name The user's first name. Last name The user's last name. Password The same password that will be specified in themid.instance.password parameter of config.xml. If you use special characters, such as an ampersand (&), you must encode the special character using character references in the config.xml file. - To configure your MID Server to use special characters in the user name or password, such as passw&rd:
- Open the config.xml file and find these lines:
- <parameter name="mid.instance.username" value="mid_user"/>
- <parameter encrypt="false" name="mid.instance.password" value="passw&rd"/>
- Make the following change:
- <parameter encrypt="false" name="mid.instance.password" value="passw&rd"/>
- Save the file.
- Note: For examples of the character references required for well-formed XML, see Character Entity References.
- Right-click the header and select Save.
- Under the Roles related list, click Edit.
- Select the mid_server role for this user.
- Each MID Server account must have this role to access protected tables.
- Important: The mid_server and security_admin roles are incompatible and cannot be assigned to the same user. For information on how the instance checks role assignments, see MID Server role validation
- Click Save.
- Download the installer file for the host machine.
- On the ServiceNow instance, navigate to Mid Server > Downloads on your instance.
- Select and download the MID Server for the appropriate operating system.
- If the download does not begin immediately, try again later when the system is not as busy.
- Save the download file to a temporary file on the local drive.
- Move the file into the designated MID Server folder you create for your operating system and extract all the files
- To configure the MID Server manually, change to the servicenow/mid server name /agent directory, and then edit the xml file as follows:
- Find the element <parameter name="url" value="https://YOUR_INSTANCE.service-now.com" /> and change the value to the URL of your instance.
- Enter the MID user credentials in the instance.username and mid.instance.password parameters.
- By default, the MID Server uses basic authentication for SOAP messages. The password value is also encrypted authentication.
- Find the <parameter name="name" value="YOUR_MIDSERVER_NAME_GOES_HERE" /> element and change the value for the MID Server name.
- (Optional) Enter connection information for the proxy server. Remove the appropriate comment tags from the proxy configuration information.
- For example, you can configure these parameters:
- proxy.use_proxy
- proxy.host
- proxy.port
- proxy.username
- proxy.password
- If you configured the MID Server manually, finalize the configuration as follows:
- Execute the shell script start.sh
- The system starts the new MID Server.
- Log into the instance.
- Navigate to MID Servers > Servers.
- The system displays a list of MID Server records.
- Select the record matching your new MID Server and verify that the Status is listed as Up.
- To configure the MID Server to restart automatically when the host is restarted, run${base_install_dir}/agent/bin/mid.sh install as root to add the auto start scripts to the directory.
- Test the MID Server connection to the instance.
- Validate the MID Server to ensure that it is trusted to access credentials used by the instance for automations.
- Navigate to MID Server > Servers.
- Open the new MID Server from the list of MID Servers.
- Under Related Links click Validate.
- The Set Initial Selection Criteria window appears if there are no records in the Supported Applications, IP Ranges, or Capabilities related lists.
- On the Set Initial Selection Criteria window, use the switches to enable or disable selection criteria for this MID Server:
- Allow ALL capabilities: Allow all capabilities for Orchestration and Event Management use this MID Server.
- Note: Service Mapping and Event Management alert aggregation and RCA, which used capabilities in previous releases, rely on the application for MID Server selection starting with the Istanbul release.
- Allow ALL applications: Allow all applications that use MID Servers use this MID Server.
- Allow ALL IP ranges: Make all IP ranges valid for this MID Server, meaning that it can target any IP address.
Set up SNMP Trap listener
-
- Navigate to Event Management > Event Listener (Push) > MID SNMP Traps Listener.
- Click New.
- Fill in the fields, as described in Event collection for SNMP traps. For the SNMP version field, select: v1 and v2c.
- Click Submit.
Now that ServiceNow is ready to receive SNMP Traps from OEM, set up such SNMP traps on OEM:
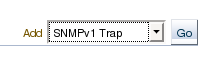
First go to “Setup -> Notification Methods”, Select “SNMPv1 Trap” on the “Add” dropdown list and click on “Go”:
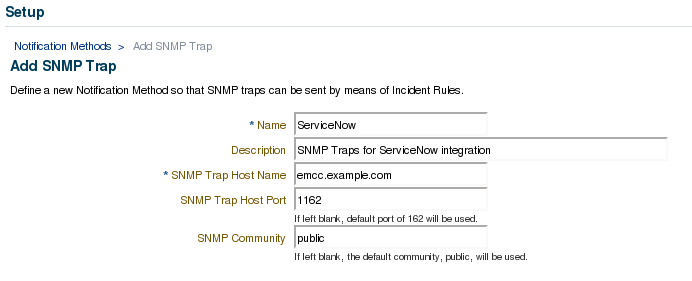
Fill in the details for the SNMP Trap, the hostname is where the MID Server is active. The default port is 1162 but it can be changed to 162.
Click on “Test SNMP Trap” and if everything is working properly, click on “OK”. The new notification method is shown on the main page:

Now select this method to send SNMP Traps to ServiceNow for the desired events. To do so, go back to “Setup -> Incidents -> Incident Rules”, select the Rule Set to be changed and click on “Edit”.
On the “Actions” page, select the action for which OEM should send SNMP Trap and click on “Edit”:

Mark the checkbox for the SNMP Trap defined earlier, then click on “Continue”, back in the “Rule Set” page, click on “Save” so the changes will take effect.
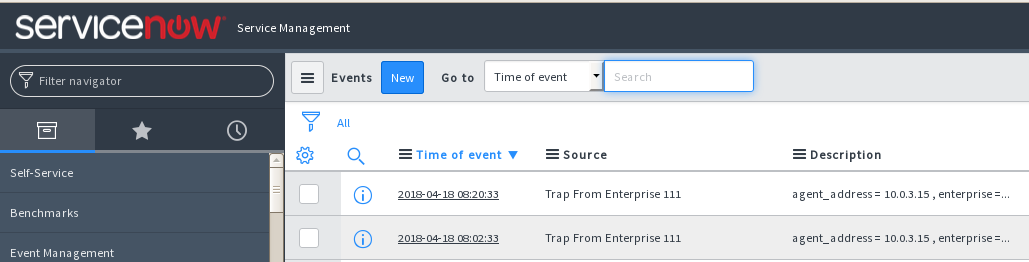
After setting up SNMP Traps, Oracle will forward an XML message to ServiceNow whenever the conditions are a match. After receiving the first SNMP Trap from Oracle, you’ll need to set up some “Events Rules” on ServiceNow in order to properly treat the messages coming from OEM. To do so, go to “Event Management -> All Events” and locate one of the Traps sent by Oracle:
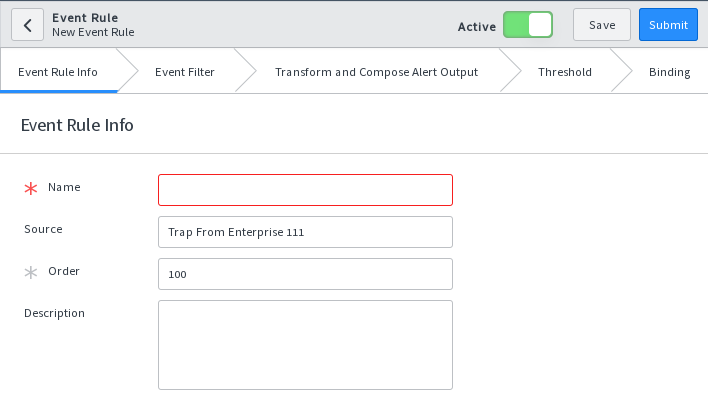
Click on one of the events to see its details, then click on the “Create Event Rule” button.
Conclusion
Appendix A - Database objects used in this series
CREATE TABLE calls (timestamp DATE, caller VARCHAR2(50), pending CHAR(1));

 CREATE TABLE calls_control (run CHAR(1));

 CREATE TABLE callers (id NUMBER(10), name VARCHAR2(50));

 INSERT INTO callers VALUES (1,'FERNANDO');
 INSERT INTO callers VALUES (2,'GUILHERME');
 INSERT INTO callers VALUES (3,'MARIA');
 INSERT INTO callers VALUES (4,'ANDREA');
 INSERT INTO callers VALUES (5,'JOHN');
 INSERT INTO callers VALUES (6,'JEFF');
 INSERT INTO callers VALUES (7,'WILL');
 INSERT INTO callers VALUES (8,'BRUCE');
 INSERT INTO callers VALUES (9,'JOYCE');
 INSERT INTO callers VALUES (10,'JOSS');
Procedure to insert data into the "CALLS" table.
CREATE OR REPLACE PROCEDURE insert_calls AS

  v_pending VARCHAR2(1);
  v_run VARCHAR2(1);
  v_caller VARCHAR2(50);

 BEGIN

  v_run :='Y';

  WHILE v_run = 'Y' LOOP
  SELECT run INTO v_run FROM calls_control;
  SELECT name INTO v_caller FROM callers WHERE id = (SELECT ROUND(dbms_random.value(1,10),0) FROM dual);
  SELECT DECODE(round(dbms_random.value(1,2),0),2,'Y','N') INTO v_pending FROM dual;
  INSERT INTO calls (timestamp, caller, pending) VALUES (SYSDATE, v_caller, v_pending);
  COMMIT;
  dbms_lock.sleep(6);
  END LOOP;
 END;

 /
One-time job to execute the procedure that adds data into the "CALLS" table. To stop inserting data, simply change the value in the "RUN" column of the "CALLS_CONTROL" table to 'N'.
BEGIN
  dbms_scheduler.create_job
  (
  job_name => 'INSERT_CALLS_JOB',
  job_type => 'PLSQL_BLOCK',
  job_action => 'begin sys.insert_calls; end;',
  start_date => SYSDATE,
  enabled => TRUE,
  auto_drop => TRUE,
  comments => 'one-time job to insert calls'
  );
 END;
 /

